
Mud is the most amazing building material. It’s beautiful, it’s local, it’s completely non-toxic, and it’s free! And perhaps the best bit is that your house takes on the colors of the hills around you, as you wrap your home in the clay of that particular place.
As outlined previously, our experimental wattle-and-daub walls haven’t been all plain sailing, but now we’re up to the fun bit – rendering the wattles with the daub (i.e. the mud). So back came Frank Thomas, master strawbale builder, and we were off at a muddy trot.


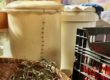
Nick stirring one of the very many drums of mud needed for our house.

Wolrd's largest egg beater. Also good for stirring mud
We collected the mud for all the walls of our tinyhouse from a pile of clay up the hill, that had been left over from dam building. The process was heavy work but quite simple: collect clay in drums. Cover with water. Stir of a very long time until gorgeously liquid. Apply to walls.
Ok there’s a few steps in between but that’s the general gist until the last step.
The last bit involved a very large and noisy machine called Priscilla, Frank’s trusty mud rendering rig. You put your liquified clay in the top of Priscilla with some sand, and out the hose comes clay render, splattered on to the walls. Ta da!

Priscilla, ready to render

Nick sprays the first coat of mud on our internal walls, over the wattle structure
Our walls needed an unusual amount of render – about 80mm thick for each wall all up. That’s actually quite a lot of mud once you count up all our walls. Don’t ask why we needed it that thick – it’s yet another owner-builder ‘if we had our time again’ story. Another lesson learned!
Apart from the downsides that a very think render means in terms of time and cost to apply, it was all good. Everyone pitched in to make the rendering happen, including all our Spring interns (thanks guys). We all learned a lot about both the glory of natural building and hard work in the process.

Sand. The only additive necessary for the render for the internal walls

Interns Jurgen and Olivier, smiling slightly hysterically after a day of rendering.

Tom sponging the final coat down to give it a beautiful smooth finish

Semi final and final coats in the upstairs room.

Completely non-toxic building means everyone can have a go...
The internal walls are now entirely finished and they look extraordinarily beautiful. They’ll take quite a while to dry, but that’s ok with me. The clay will create a ‘breathing’ home that slowly absorbs and releases moisture from the inside air, modifying the humidity inside year round. Yay.
The external walls are a lime and sand render, to help make them weather proof. Initially we planned to use a natural paint on the outside walls to match the color of the inside clay render that didn’t have the addition of lime.
Now, however, I’m coming around to the color of the lime render and we’ve decided to leave it as is. There’s a couple of advantages to this: the lighter in color the building, the better that building can cope in a bushfire (as it reflects instead of absorbing heat). This seems a small point but it’s a big one for us, given where we live.
The other reason for going with a white(ish) outside is that: it is what it is. I’m really valuing the truth in this very small building – the wood, the clay, the simplicity and the effort gone into every detail. And the lime render is part of that simplicity. It is what is there. And so we will live with that, joyfully.
As you can probably tell from these images, we’re not in much danger of moving in anytime soon. But that is, mostly, ok with me.
Until further notice, we’re back into ‘open mode’ here at the farm – we’ve got 6 (really) amazing interns working with Nick and Trev to design and implement all sorts of projects. We’ve got on-farm education coming out our ears. And we’ve got a little one who needs his mum and his dad every day, right now, not just once the house is finished.
Once again, if I have a hair-tearing moment about living in limbo, I don’t need to think far outside our life to realize how insanely lucky we are here at Milkwood: good people around us, a clear purpose, a chance to share truly useful knowledge and more than enough food to eat.
Amen, and let the house rest. It’s walls will breathe quietly until the next flurry of building energy.
Thanks to our fabulous spring interns Sabina, Jurgen, Ashley, Adam, Claire and Olivier for lending a hand for a day (wasn’t it fun?). Thanks also to Frank Thomas + Tom from strawtec for all their efforts.
Thanks most of all to Nick for yet again holding it together on this ongoing owner-builder adventure, when I would have thrown up my hands and sat down in a puddle of mud. We’ll get there, my dear.
Related posts:
- all our posts about the tinyhouse
- all our posts about natural building


Another advantage of plain lime render is that you don’t have to try to match colour when you’re repainting or patching up. We have lime washed sand-cement-sawdust walls, and whenever there’s a bit of new building or altering or even when a particular trafficked area just needs a spruce up, it is very easy to mix an ice-cream container of lime wash and paint it on.
good point, Linda. And something tells me the exterior of this house will get quite a workout as the central heart of Milkwood, so many small patching jobs may well be in order!
I am following your Tiny house progress with much interest, but should the wall render thicknesses read 80mm, not 800mm?
well spotted Wally – it’s 80mm. Sorry about that. Me and my zealous use of zeros!
Looks good. I know the frustration of a slow going building project, but its all just part of the owner builder journey. It took us 9 months to put up our post and beam frame (obviously we did other stuff in that time not just building!!!). Its good to put things into perspective sometimes, and you do realise how lucky you are to have all the things you have. The house will get finished eventually, and when its done you will probably wish sometimes you could still be building it, as you will miss the excitement of seeing it come… Read more »
Hmm. Not sure about that. I’ll be too busy drinking tea and having a lovely time sitting at my very own kitchen table while I design the integrated pasture cropping / dehesa / pig tractor systems to wish that, I hope! 😉
What an adventure! I must admit to enjoying the fun of living vicariously through you (it comes with all the benefits of learning about living a healthier more satisfying life, without having to experience the hardships… until its our turn to do the same in real life).
I love lime render for its beautiful aesthetic quality, it reflects heat, is flexible, allows the house to breathe and is also great as an insect and rodent repellent. I can’t wait to read the next installment and I’m hoping things are getting easier now that you’re on the home straight!
Glad yr enjoying our travails, Genevieve 😉
Stumbled across your post and I must say I am intrigued by the use of Mud as a construction material.
Ha, you’re going to miss it when it’s gone! The building process that is. Don’t tell me you won’t, because I know better, LOL. Not that we’ve ever built our own house, but we have taken many years to erect our various retaining walls around the place. This is the first year we’re not building any. I thought I would celebrate and walk around our garden admiring all our hard work. Truth be told, I’m missing the physical labour and slow meditation that comes with a long term building project. It had become part of my daily ritual – thinking… Read more »
Love that first photo – if Nick just posed slightly, you’d have this:
http://en.wikipedia.org/wiki/The_Thinker
Awesome!
hahahaha! Don’t think Nick was thinking much after 6 days of rendering at the point i took that photo – if you look closely, you can see the star picket i shoved down the back of his shirt to hold him upright – otherwise he’d just have been in a pile on the floor!
One downside to the white lime render is it isn’t that good to retain heat in a naturally heated home.
Apart from that, I like the idea that it may help in case of a bush fire. Though that will be tested IF a fire ever comes through. (Crosses fingers that it doesn’t)
Hope you don’t mind copious amounts of emails in the new year asking how you did certain things 😉
The lime render is on the outside of the building, and the insulated core of the walls mean that its thermal retention doesn’t have any bearing on the inside temp anyway – but good point on it not retaining as much heat! 🙂
Hi Milkwood !, years ago at Windeyer at Dusky Esky Studio/residence I placed a tin bath near the dam,placed a coir mat in the bottom an mudded up a firebox and chimney made from stacked and tubed four gallon drums, filled it up with water and sat through moonlit nights with company enjoying the night sky, then bathrobes on an dash back to the open fireplace to dry off !, i never felt cleaner with the dam water, but caution using same after heavy rain as run off can contain organisms that take a week to stabilize !. I used… Read more »
I also bottled in this then derelict French Walled gold miners shack windows with ancient farm wheels as windows and used clay pug(a natural occuring mix of smallish stones edged in a wheel barrow with a shovel and rake to make it pliable and then built with recycled chook wire reinforcement a bottle kiln in my then living room.We are now using creek shingle /fine sand/dam clay mix for bedding the larger stones in a feature wall and using the rounded flat stones as pathways, steps etc, and sweeping creek sorted fines to quickly fill gaps which looks and feels… Read more »
will do, Peter!
Hi Milkwood !, the creek has sorted out beautiful fine sand, flat smoothed cobbles which we have paved the activities area at the Studio (casting, pottery,blacksmithing) and we are using clay pug with creek shingle(the creek sorts it all out with marvelous flat and rounded larval stones which we have cobbled the activities area. Try edging the dam clay if buff colored as ours is magic when mixed with creek fines aggregate and fires up well in a rough raku kiln we built, started with a slow fire in and on with the old Electrolux and simple modified spray burner… Read more »