Winter is a great time of year to welcome new strains of tasty mushrooms into your backyard. You can even gather some edible species from around your local ‘hood, and then multiply them at home with this easy mushroom cloning technique – to make DIY mushroom spawn on cardboard.
All you need is some cardboard, and a little time.
And in a few weeks, once your DIY mushroom spawn is growing, happy and healthy, you can then tuck them in all around your garden, (along with woodchips, which have been prepped with a simple technique we will show you) to create an edible mushroom garden.
We love mushroom gardens – they’re a beautiful way to bring the forest home, building diversity in your backyard, AND increase your household’s resilience with yet another tasty mushroom harvest.
The best bit? They (the mycelium) will take care of themselves, grow at a pace that suits your garden and the seasons, and then pop up in flushes of tasty mushrooms, when the mycelium is good and ready.
This technique is super simple. You gather suitable edible mushrooms, like Wood Blewits, that are popping up under certain trees and at the edge of wooded areas – and then you can get making your own DIY cardboard spawn!
This spawn can then be used to inoculate mushroom gardens wherever you like – in garden patches, underneath shrubs and trees, along your woodchip paths, or whatever you’ve decided would be a great spot for a patch of edible mushrooms.
Which species of Mushrooms can be grown this way?
See our 10 Top Mushrooms to Grow at Home guide for a bit more info on different types of mushrooms that LOVE growing in gardens – including King Stropharia, which we talk about extensively in our Home Mushroom Garden how-tos.
You can use this technique with many kinds of mushrooms that like to grow in this way. Not all mushrooms like to eat the same foods, so it’s good to know what will work and what won’t – but there’s plenty of easy to grow, super tasty mushrooms that live very happily in woodchip and compost-rich environments in your backyard.
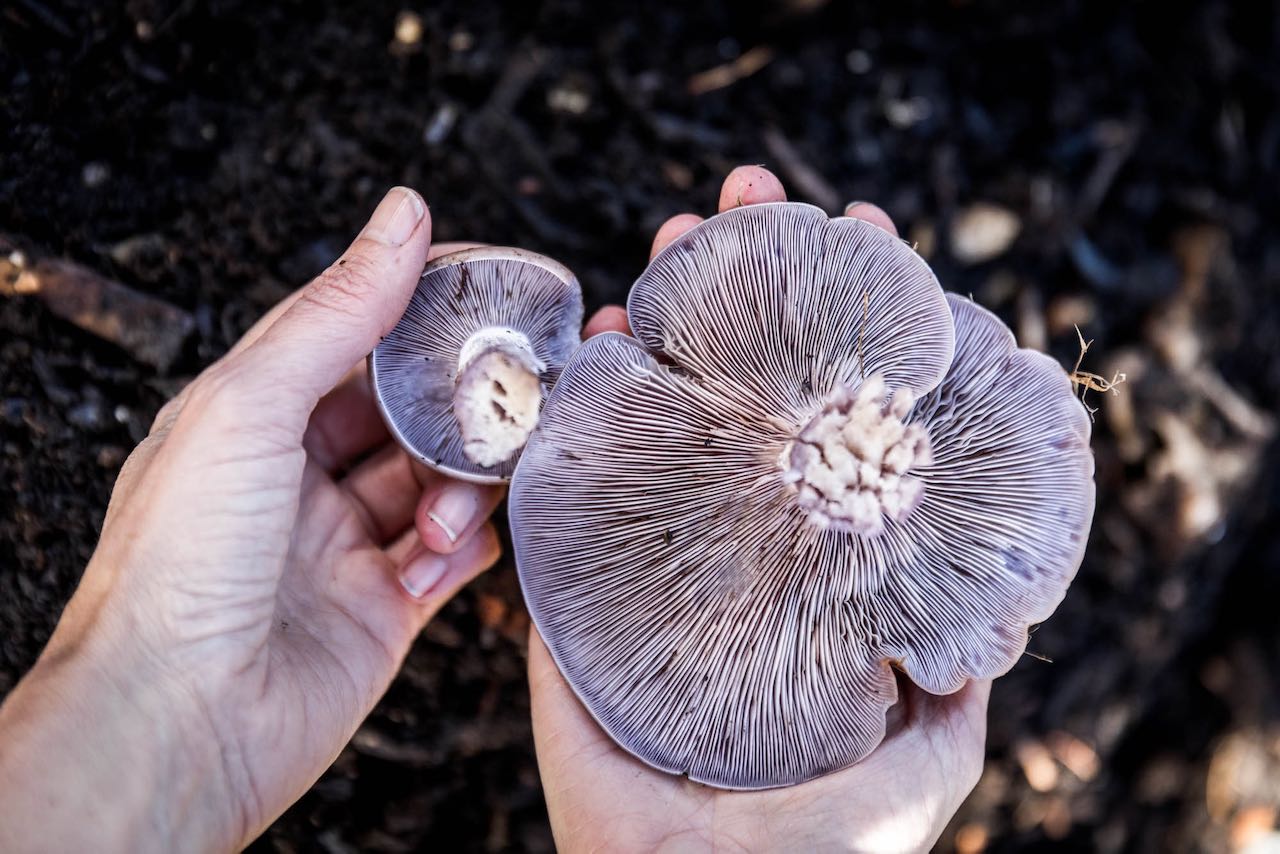
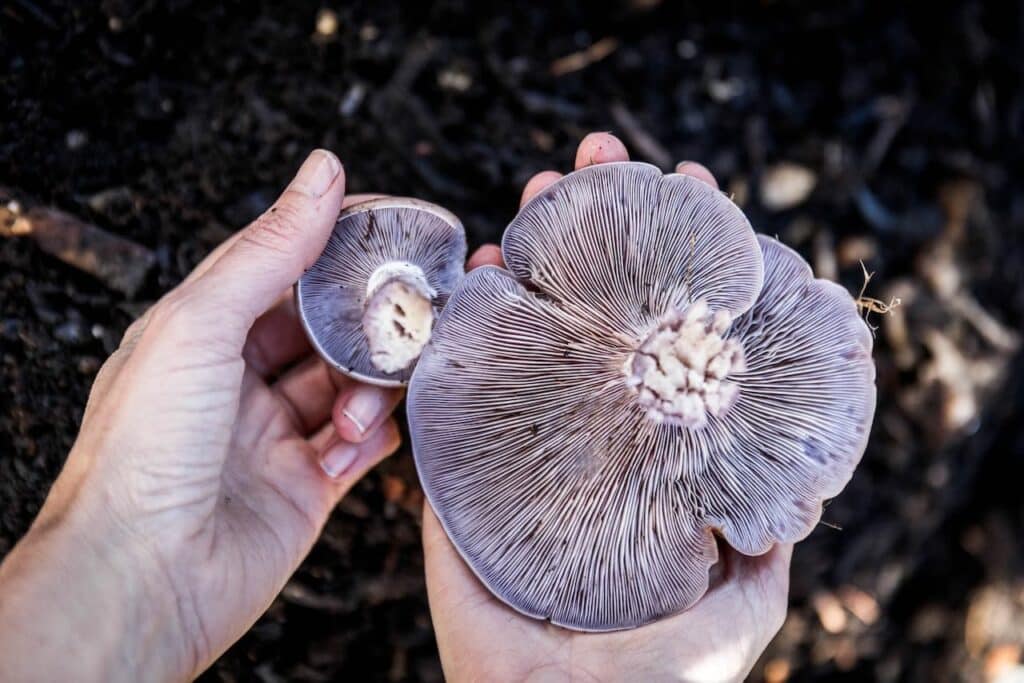
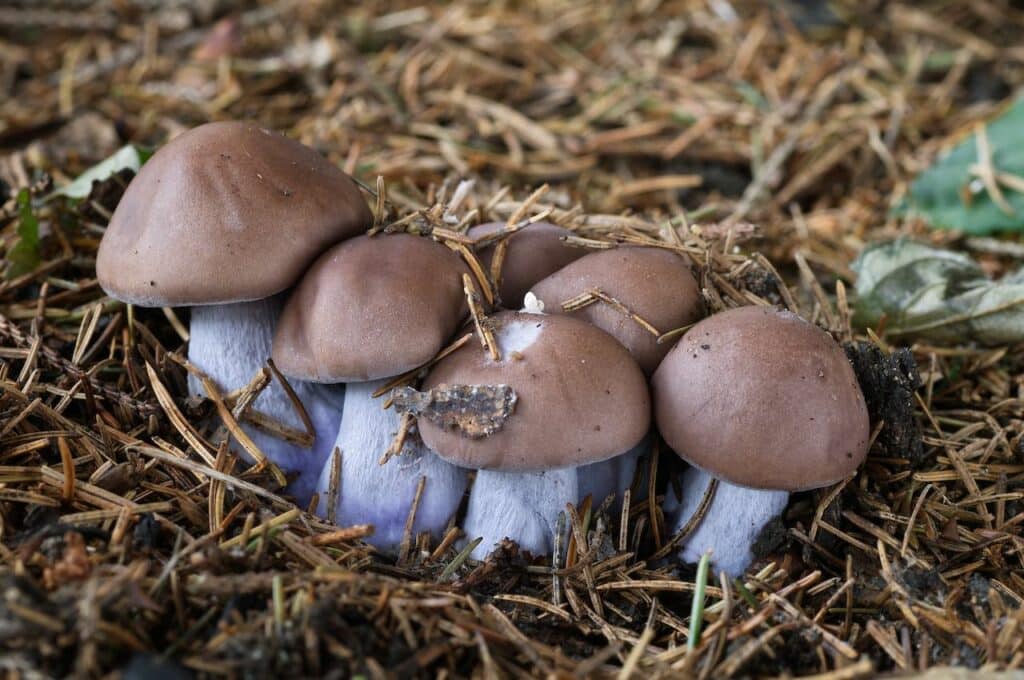
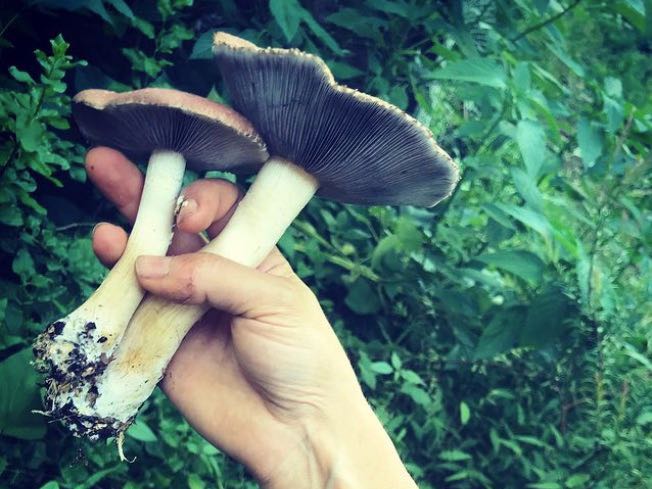
For the purposes of this example, we’re using the Wood Blewit (Clitocybe nuda), also known as Lepista nuda (full description here). They’re a mushroom that primarily grows in deciduous and coniferous woodlands, but can also be found in grassy areas such as fields and pastures.
Wood Blewits are a saprotrophic species, meaning they feed on dead organic material. They particularly likes growing on organic matter that has already partially decomposed, so they’re typically found growing in rich soil or in leaf litter. They appear during autumn and winter months in temperate regions all over the world.
Wood Blewits like cool, moist environments, grow in small clusters, and they can sometimes be found near compost piles due to their preference for organic material. Keep in mind that while this fungus is edible and enjoyed by many, it should be cooked well and it can be confused with other, inedible or toxic species, so it’s important to make sure you have a positive identifications before eating them.
Blewits, like all fungi, are a valuable part of the ecosystem. One of their particular jobs in this web of life is taking woody material and further decomposing it, by eating it, to take that material further towards being rich topsoil that more and more life can thrive in.
They are easy to grow, very tasty when well-cooked, and a great garden friend to have in your backyard.
Here’s a snippet of Nick talking about making cardboard spawn in a free online workshop we did, then below that is the full step by step guide.
DIY Mushroom Cardboard Spawn: an Easy Mushroom Cloning Technique
So as said, this easy mushroom cloning technique is perfect for the ‘secondary decomposers’ – the mushrooms that like a rich complex substrate of woody materials – such as King Stropharia or Wood Blewits.
You can make this DIY mushroom cardboard spawn from everyday items that you probably already have in your home, once you’ve got your mushrooms!
Supplies
- A handful of suitable fresh mushrooms you wish to use, with their stem butts intact
- Cardboard with corrugations in the centre (and not glossy, waxed or super inky).
- A cardboard tube from a roll of toilet paper.
- A ziplock plastic bag (reuse one if you can), glass jar or plastic container that seals well.
Method:
- Soak your cardboard & toilet paper tube in warm water for a few hours, then pull away one outer layer of the
cardboard to reveal the corrugated centre. - Leave your cardboard to drain until it is damp but not dripping
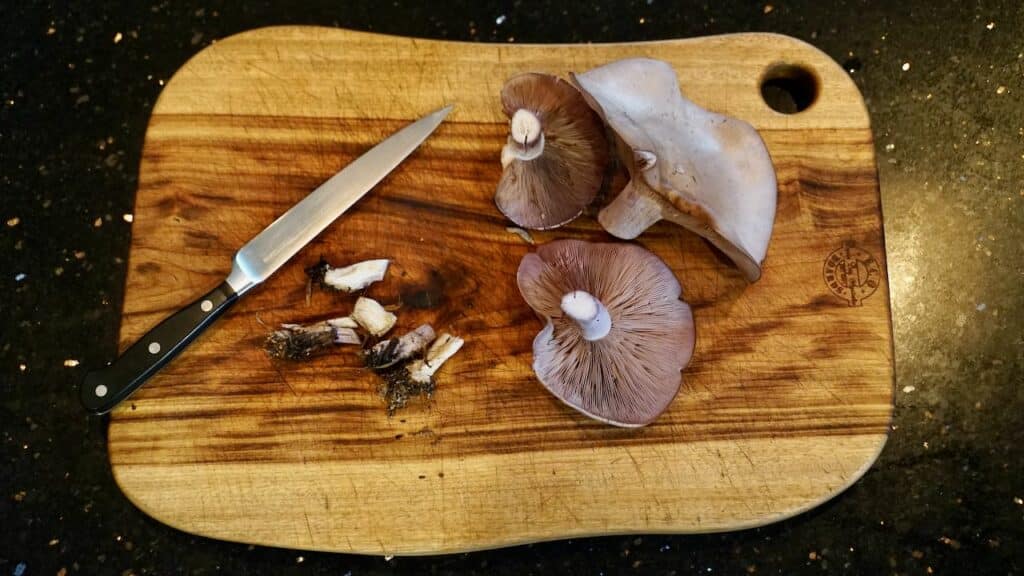
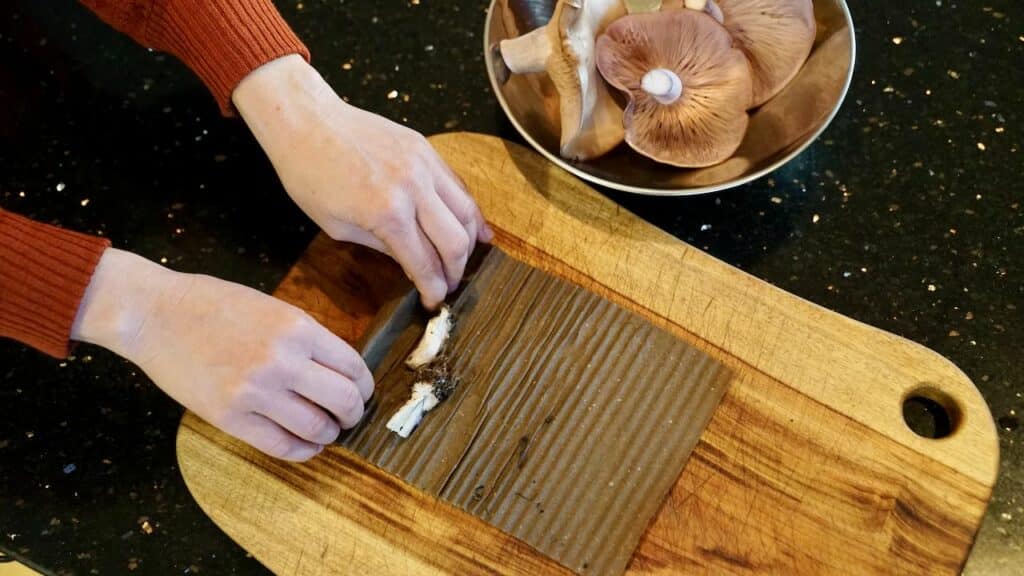
- Cut the bottom off your mushroom stipe – saving the
bottom 2.5 to 5cm (1-2 inches) of stem butt - Assuming you’ve chosen an edible species, you can eat the rest of the mushroom – yay!
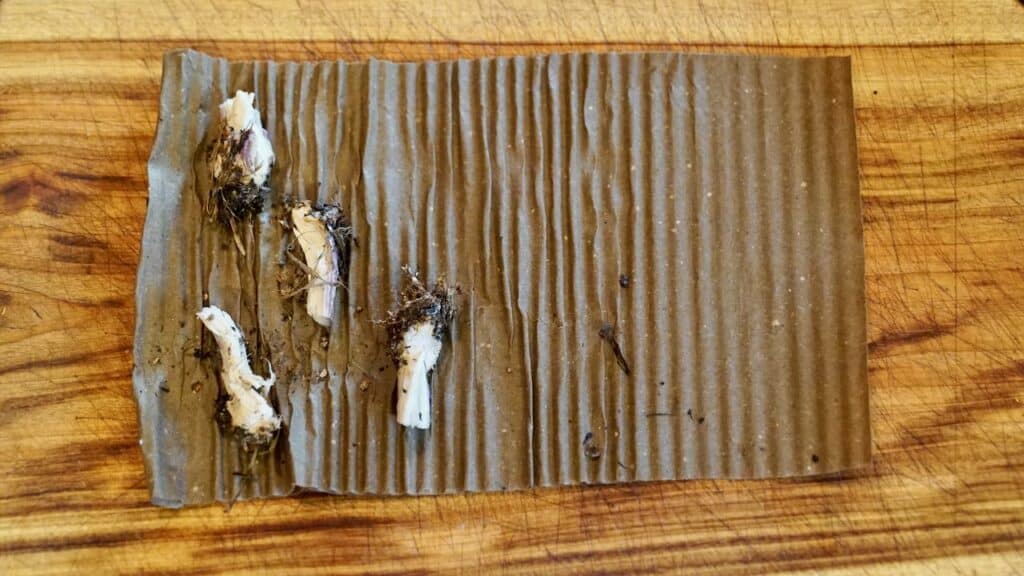
- Tear these mushroom ‘butts’ up into a few smaller pieces, then lay them on top of one edge of your corrugated cardboard.
- Roll your cardboard up, ensuring lots of points of contact between the stem butts and the cardboard – you want it as cosy as possible, while still having air to breathe
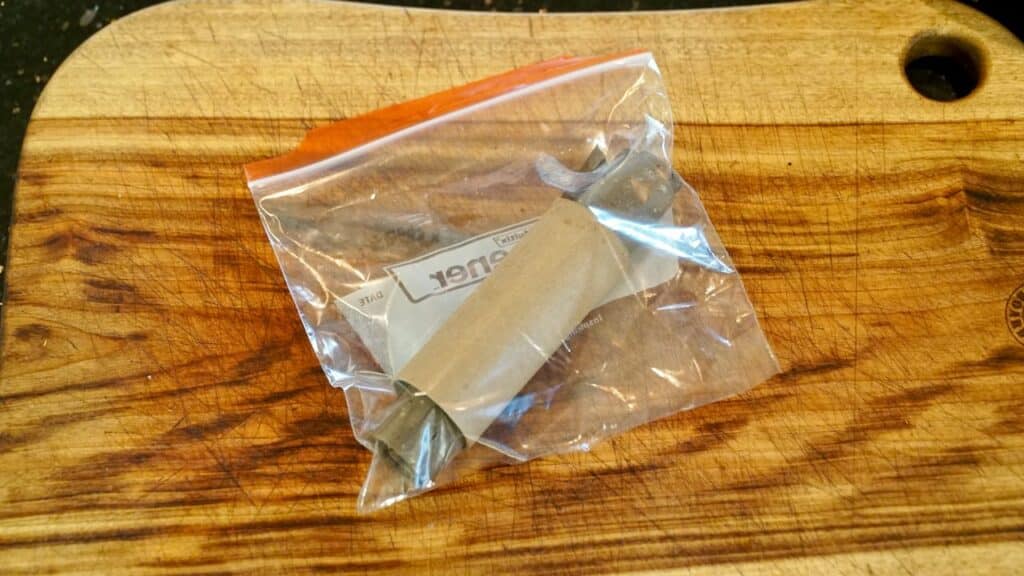
- Put the cardboard & mushroom roll inside the toile paper tube, to keep the cardboard from unrolling.
- Place the whole bundle in the plastic bag / jar / whatever you’re using, and seal.
- Put this roll in a dark, warm place somewhere in your house, around 20 °C. Inside a cupboard is fine – don’t worry, it’s not in a ‘making spores’ stage of it’s life cycle. It’s busy growing mycelium.
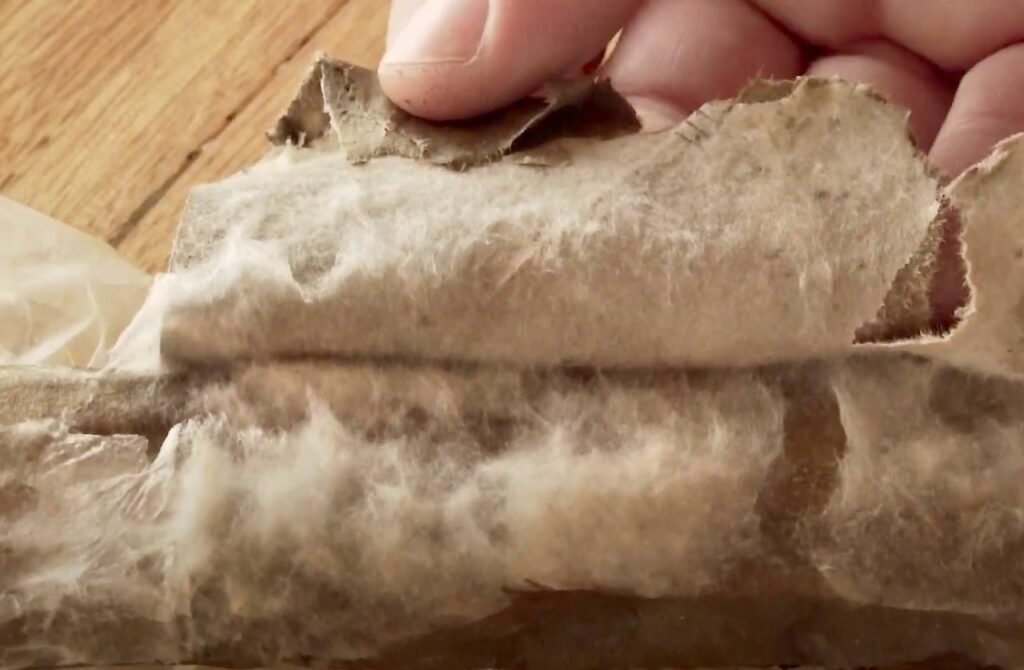
- Check the cardboard after a week to see how it’s going. If it’s not mouldy with blue/green tinges, and is starting to get a little white and fluffy (see video), it’s working – nice one!
- After a few more weeks the mycelium from the mushroom stem butts should have started to grow through the cardboard.
- When the cardboard is fully myceliated and looking white and fluffy you can use this cardboard to inoculate a mushroom garden or patch at your place.
And once you’ve got your spawn… it’s Mushroom Garden time!
So now you’ve got your healthy mushroom spawn – either made using the DIY technique above, or with a bag of suitable spawn from an online supplier (check which species are good for this garden technique before you buy anything).
The next step is to get making your mushroom garden:
- Here’s our free mini workshop on how to establish a mushroom garden, from start to finish.
- We also have a short course in this cultivation technique, if you want to dive deeper.
Notes on different mushroom garden-suitable species:
Wood Blewits: you can use this spawn to inoculate a patch of compost (or tuck it into an existing compost pile, down the bottom) to spread it’s mycelium. You can also use the mushroom garden woodchips technique but Blewits are a great ‘we’ll eat anything’ species when it comes to decomposed woody matter, so they’re great in compost too.
King Stopharia: this is a cultivated species (native to Europe and North America) that you can also multiply using this technique – King Stropharia are better suited to pastuerised woodchip gardens – more info on how to make one of those below.
Other species – depending where you live, you can try other species using this technique – just make sure that you’re using mushroom species that love decomposed organic material – so NOT things like shiitakes, which prefer fresh(ish) wooden logs.
And of course, you don’t have to limit yourself to just one species – you could grow Wood Blewits in one patch, and King Stropharia in another.
Just give each of your edible mushroom patches their own space in your garden, so that the mycelium don’t have to spend their energy competing with each other – you want all that energy to go into establishing, and then fruiting into the tasty mushrooms of your choice.
Do I REALLY have to do all this, or can I just tuck bits of mushroom directly into my garden?
This is a common question, and it’s a good one. Yes, you can just go ahead and tuck bits of mushroom stem butts, and mushroom directly, into your compost pile (particularly talking Blewits, here) and…. it may work, sometimes.
But because mushrooms are very delicious to lots of life (not just us!), it’s also likely that your mushroom bits will get munched before they’ve had the chance to establish.
By using this super-simple DIY mushroom spawn on cardboard technique, you are jump-starting the mushroom’s mycelium back into it’s growth habit, while also, and this is important, providing it with an ideal growing environment (the damp cardboard) where there’s no other bugs/slugs to munch on it, there’s plenty of food, and very little fungal competition from other species for that first crucial phase of mycelial growth.
All this extra help to the mycelium means that it will be able to grow strongly – and when you do add your cardboard spawn to your garden, it will be rip-roaring-ready to go – which is what you want. Think of it as planting a healthy seedling, as opposed to a single seed.
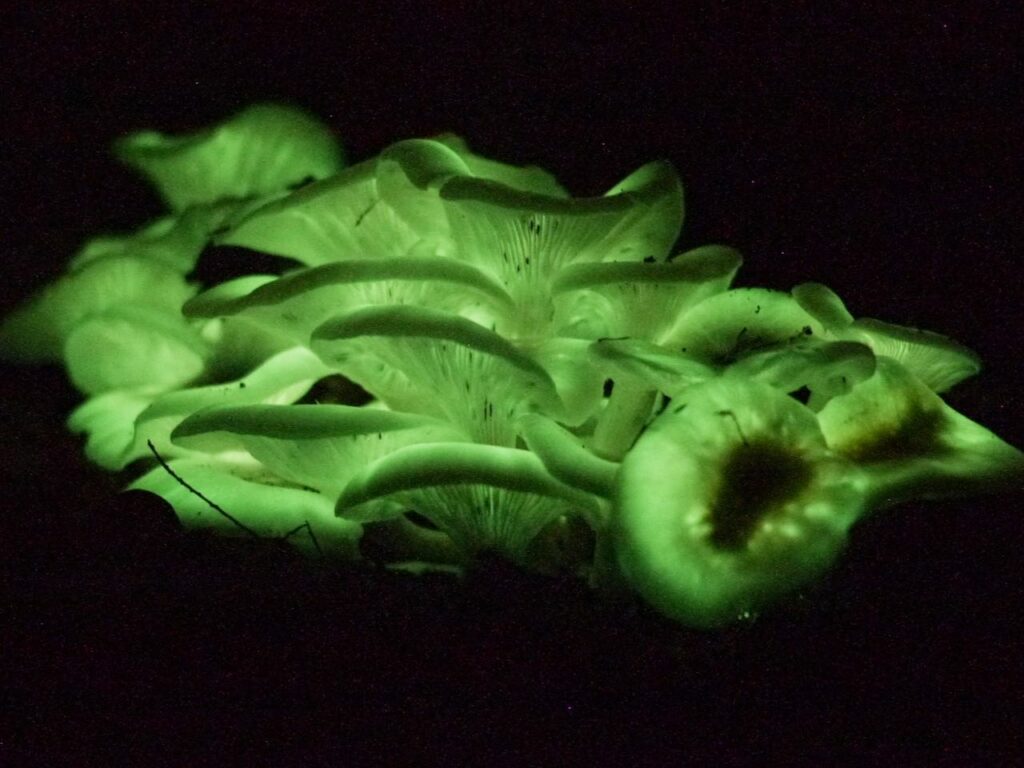
As a decorative but non-edible garden addition, you could even try establishing the beautiful and bioluminescent Ghost Fungus (Omphalotus nidiformis) which glows in the dark, to light up your garden pathways at night?
Mushroom Garden Resources
- Creating a Mushroom Garden – mini workshop video and guide
- Our 10 Best Mushrooms to Grow at Home guide
- Our free Beginner’s Guide to Mushroom Cultivation
- All our Mushroom cultivation articles + resources
- Our Growing Mushrooms in your Garden short course
- Our complete Home Mushroom Cultivation online course, which contains All The Ways of growing + ongoing mentorship for keen beginner growers.
Any more questions, please ask away below! Always happy to help you get growing 🙂



Yay, I’ve just pre-ordered your book and I can’t wait! I love this time of year too. It starts for me with decking the halls with winter-themed decorations on the first of June, then a quiet and reflective winter solstice night (I might sneak out and do a cheeky wassail for my apple trees). Then a winter solstice feast of Beef Wellington with trimmings and a fig and ginger pudding, on the weekend closest to the solstice, this Sunday coming (I need time to prepare!). Yuletide starts on 1 July, and up the tree, lights and Yule decorations go, ready… Read more »
How can I get those Wood Blewits
I live on the mid-North-Coast NSW.
Thank your for your generous sharing
hey Veronique – hmm it might be a little too warm where you are for blewits? They’re found in damp places, on the edge of wooded areas, in colder months – if you can’t find any but you rekon they would work in your area, you can get spawn from Aussi mushroom supplies – which costs the first time, but once they’re established you’ll be right – https://aussiemushroomsupplies.com.au/product/mushroom-spawn-bag-1-7kg-wood-blewit-lepista-nuda/
Can I grow mushrooms in Alice Springs?
Heya Elena – yes you can, though I’d recommend starting with bucket culture, as you’ll have more control over the humidity of the mushrooms when they’re fruiting, and you don’t need to worry about their moisture levels during the incubation phase… here’s some free resource guides that you can download: https://www.milkwood.net/courses/
Can you grow the white mushrooms this way, that you buy in the store?
Heya Darlie – some of them, yes – the oyster mushrooms that you can buy will work in this way (sometimes) – button mushrooms won’t however, as they need different growing conditions 🙂
realy good info. Will do my best to try it out. Thanks!
let us know how you go with it 🙂
Wow, thanks folks. I now have King Oyster spawn going great guns,at basically no cost. I never read instructions properly so i didn’t do it exactly as described 🙂 I prepared a 1L yoghurt tub by poking holes with a hot skewer and covering them with micropore medical tape. Soaked some of that semi-shredded paper that responsible companies are using for packaging, squeezed it dry, and sliced the stem butts from a couple of big healthy King Oysters (from the Asian supermarket, not Woollies – much fresher) 2-3mm thick; scattered them over the paper, rolled it up, popped it in… Read more »
great stuff, bethany – excited to hear how you go? 🙂