

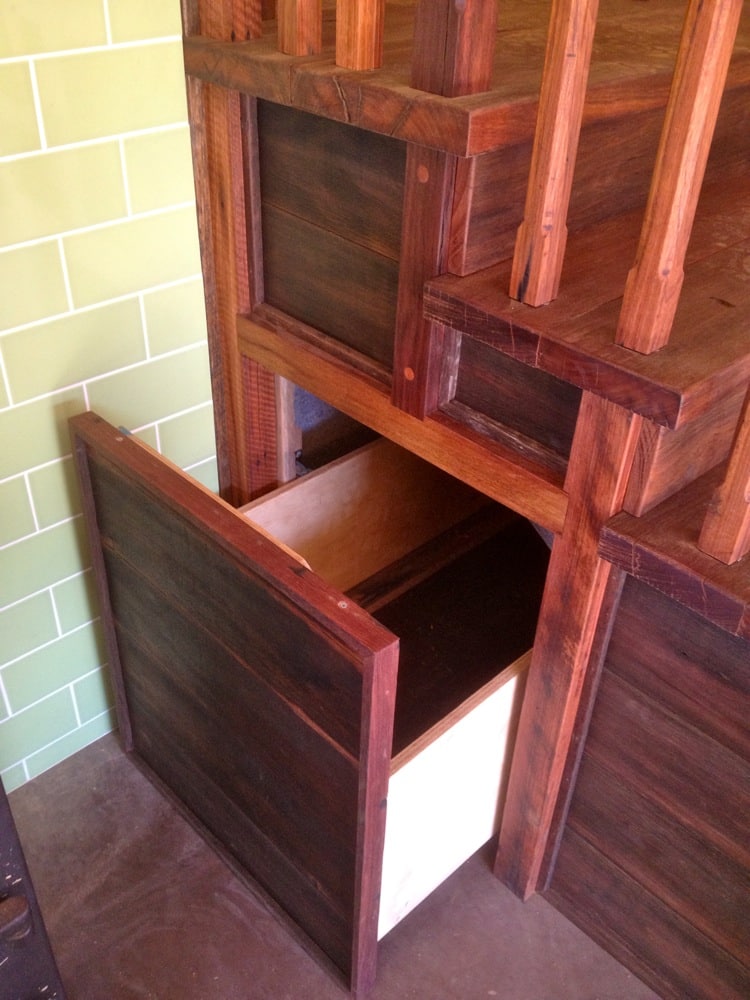
The inside-outside woodbox for the tinyhouse is competed and now awaits filling! Now we can simply add firewood via the little, purpose-built external door, and open it from the inside, right next to the woodstove. Yay for easy heat and cooking energy delivery.
I suppose if our spanky new (ok so it’s salvaged, but it’s new to us) Rayburn woodstove wasn’t the main engine of winter water heating, house heating and cooking goodness, we wouldn’t have put so much effort into this woodbox.
But given that the tinyhouse is primarily wood fire powered (in addition to solar hot water and passive solar design), sorting out the wood delivery system is, to us, as important as installing a the gas line, or getting electricity to our house.
Plus fire wood is something that we’ll use every day for at least 6 months a year. Its use will be habitual and essential.
When you look at it in that light, getting the wood delivery system right is worth it. We could just schlep the wood in from outside of course, but since our tinyhouse design provided the opportunity to combine under-stair storage with inside-outside woodbox technology, we went with it!

Wood box cavity in the making, with door to the outside for easy wood loading


Outside wood loading door

Ashar being a stunt double in place of future firewood

And… delivered!
Now all we have to do is learn to use a wood stove. I get the whole basic heating thing (don’t over-fire the stove, use good wood, etc), but the intricacies of maintaining stable wood-fired heat to bake something at a vaguely consistent temperature? It promises to be a small but significant domestic learning curve…
The inside outside woodbox was devised by Nick with various conversations + tips from knowledgeable builder types, architects and of course the amazing Shane Mills, who had the task of actually building it and did a superb job, as always.
Thanks everyone for your input, we owe you all a wood fired scone – maybe wait a little to redeem our thanks however, until we learn how not to burn baked goods…