
Milkwood Farm is now officially 100% solar powered. Yay! 12 CIS solar panels are now affixed to the roof of the top shed and turning sunlight into goodness for power tools and light, as we approach the move-in date for our tinyhouse.
Being off-grid as we are (even though our family farm next door is on the grid, but that’s another story), solar power was the obvious solution from the beginning. And in the beginning, our power needs were very modest, as can be seen in this here video:
But things have changed since 2007. We’ve (nearly) built a house. What was a ‘DIY shack in the bush’ plan is now blossoming into a fully-fledged educational permaculture enterprise/learnscape/farm with a community of incredible practitioners who share this place with us.
And henceforth, we now need more than one solar panel.
Stand-alone solar has always been the main option for our site, given our budget. Extending the power line over the hill to the tinyhouse to do grid-connect solar would cost over 30k before we even got to the solar system components. Hydro is not an option. Wind power sporadic and expensive. But we do have one thing here, and that is plenty of sun.


The solar system that has just been installed was actually purchased 2 years ago and has been sitting in storage in the interim (we were somewhat over-confident of our move-in date back then). If we bought this system now it would be much cheaper, but there you go.
The solar system that we bought was purchased for a small family’s’ power needs in mind (ie not very much), but luckily we bought an inverter capable of much greater power needs, so we can add panels and batteries in the near future as needed.
After much research we settled on CIS thin-film photovoltaic panels which use less silicone and have overall low embodied energy compared to most solar panels that were available at the time. Although they have a lower efficiency per meter squared, they make up for that with their exceptionally low energy payback period…
Advantages of these type of panels:
- Better performance in high-heat conditions
- Cadmium and lead free
- Greater shade tolerance – Exceptional performance under cloudy, low light and partial shade conditions
- Shorter energy pay-back time (EPT) or level of embodied energy than other panel types – CIS panels require less energy to be manufactured, 40% less than standard crystalline silicon panels.
To that we added a whopping big inverter, batteries and various tangly bits. Here’s the full rundown of our system:
Milkwood Farm Solar power system, to deliver a daily average of 5000 Watt-Hours nett into loads at Equinox:
16 x USNX-65 Advanced thin film , CIS ( Copper / Indium / Selenium )
65 Watt solar power modules. ( 1040 Peak watts ) Temperature stable,
broadband solar radiation response.
1 x 50 AMP Solar regulator. Maximum Power Point Tracking.
( M.P.P.T )
1 x 3000 Watt inverter / charger, with inbuilt automatic
transfer switch. When backup generator is started, the inverter transforms
into a powerful 2000 watt per hour battery charger. ( 40 Amps @ 48 Volts D.C )
Inverter surge rating is 6000 watts.
12 x 12 Volt, 250 Amp / Hour AGM batteries. Maintenence free,
safe and clean. Wired in series “Quads” to achieve 48 Volts, then parallelled
in three vertical rows to deliver 48 Volts x 750 Amp hours = 36,000 watt-hours.
For all of which (plus extra bits and pieces) we paid about $22,000 in total. Sadly not with RECS attached, and we missed the whole solar system rebate window also, for a range of boring and un-blogworthy reasons. But anyway. We have power!
Our friend Matt Herbert who runs Aquaponics pty ltd on the other side of Mudgee is also happily a solar system installer, so he had the task of installing the panels with Nick and helping us figure out all the bits to make it all work. He did a great job.


The batteries and inverter are housed in a little shed inside the main shed, which is locked to prevent small fry from using it as a cubby and fiddling with important bits. This is possible because the batteries are sealed lead acid batteries, so they don’t need airflow.
We went for a large bank of Hybrid gel absorbed glass mat valve-regulated lead–acid batteries because the bigger the battery bank, the less you discharge them, and therefore the batteries overall life is increased. Given that batteries are filled with pretty nasty stuff, we wanted to make the most of them for as long as possible to minimize replacements.
We have 12 x 250 amp hour 12v batteries arranged in three parallel banks of 4 batteries giving us 750 amp hours @ 48v or 36000 VA . As said, we don’t ever want to use more than about 40% of that capacity to ensure the battteries have a very long life as these are the most environmentally costly part of the system.
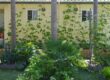
We put the solar panels on the top shed rather than the tinyhouse roof for a couple of reasons, but primarily because there was more space up there! And the shed roof was conveniently pointed due north, which helped. We also needed power to that shed anyway, and it also made sense as a location should we experiment with wind turbines in the future
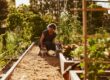
Once the panels were up, it was time to dig a trench down the hill to the house to run the power cables down. We also needed to run the gravity fed drinking water from the shed down to the house.

Utilities trench, snaking downhill to the tinyhouse

David Holmgren gave Nick the advice to run all our services down the hill in one trench, and make it next to a road, or better yet in the middle of a road if possible, because then you always know there the trench is.
Which when you think about it makes so much sense. If everything’s in one trench, there’s less chance of digging into important pipes unknowingly.
The trench is 600mm deep and was laid in the following order: Power laid lowest in the trench (heavy-duty 16mm squared copper cable, double insulated and encased in waterproof conduit), then 200mm above that the water pipe, with a warning tape buried halfway between the water pipe and the surface.
In this configuration, if you do dig in the wrong spot, you firstly hit a warning tape. If that doesn’t send off alarm bells, you’ll then hit the water pipe, which would make the accident obvious. Only if you don’t see both these obvious indicators do you hit the power cabling below.
While digging through the water mains is a bother and a cost, its a heap better than digging through power cabling, which is much more dangerous to do, and more expensive to fix. By keeping everything in the one trench, we’ll hopefully also minimise accidents of this kind overall, by not having multiple trenches.
As would be expected when digging a long, deep trench, the minute it was finished, the rain came down, providing us briefly with a very long, thin, downhill-racing river. But we got it all done and sorted in the end.
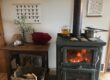
At the other end of this trench is of course the tinyhouse, the main destination of said water and power. And also our toolshed! The container of dreams that has served us so well, keeping all our tools dry, but sadly in darkness these past few years.
Can you imagine having a shed with no light except that which comes in the container’s door? It makes finding things somewhat of a miracle at times.
But no more of that! The container had the honor of containing the first light we hooked up to the solar power. Huzzah for tools you can see!

Nick being blinded by the brilliance of our first light on the new solar system, and its ability to make all things apparent (excuse the mess) in our container-shed…
Big thanks to Matt Herbert for helping us out muchly in our time of need! Also thanks to David Holmgren for the trench advice, to Cam Mcdonald for wiring everything at the other end, and to Shane Mills for his ongoing awesomeness.


Your container looks JUST like our one! We have been off the grid with solar power for 3 years now, its awesome, don’t think I could go back to mains power, black outs and bills.
I don’t envy anyone having to dig a trench in your soil though! My goodness you have alot of rocks!!!!
Congratulations!
Reblogged this on Nature and Us and commented:
WOW! CONGRATULATIONS!
Grats! Nice looking panels too…
Mind listing the individual prices for the solar setup and where you got them from?
Jim Meaney invented and Manufactures a Solar Heat Panel that conVerts SunShine (even on partially Clouded Days AND in OutDoor Temperatures as Low as -20 Celsius, -4 Farenheit). Jim Builds and Ships Panels to 18 Countries. His Panel is Rated as one of the Best in the World by Mother Earth News (Autumn 2008 Issue). This Panel Pays Back in about 3 Years and it’s Truly Free Heat from there; it has a 20 Watt Fan to Pump up to 2000Watts of Heat into the Building. Check it out at http://www.cansoair.com
Cheers! Monty Newhook BEd.