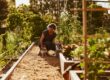


Cold frames are a great way to get the jump on the growing season with your seedlings, without a big outlay of cash. Recently we built a bunch out of re-purposed glass doors and hardwood frames, and they’re working a treat.
Since our last frost is in November, September is still full of icy mornings, which is not good for seedlings. After researching various cold frame designs, we settled on this design based on time, funds and Michael’s previous experience… 


Michael has situated the cold frames just above the bottom dam. It’s a sheltered, north-facing place, relatively flat, and just up from the market garden. Cold frames need to be placed near the daily work as they generally need to be covered at night and opened up a crack during the day so they don’t cook your seedlings.
We’re all pretty happy with this simple design. We didn’t go with strawbale as the surrounding housing as mice love strawbales, and mice and seedlings (as discussed here) do not mix!
The cold frames can also be moved if needed, and should last us many years.
I’m sorry I dont have a picture of the testing process of defining which glass to use, however. One of the parameters for making these was to ensure the glass we used was toughened or laminated, as a big, big sheet of broken glass is obviously not a good thing.
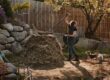
But how exactly do you tell if your recycled glass door is toughened glass? In short, you drop a rock on it.
After smashing several glass doors from our shed stash of building materials, we found several that would fit the bill and last the distance. Huzzah for no big shards of broken glass, should someone drop the lid while opening or closing the cold frames…


The size of a standard glass door also happily fits our bread trays of soil blocked seedlings perfectly. So it’s off into Spring we go, with a jump on the season that will allow us to be harvesting good food sooner…