So what does a permaculture design process look like on the ground, outside the world of a Permaculture Design Course?
Here we have Dan Palmer, who’ll be teaching an Advanced Permaculture Design Course with us in October, sharing an example of his design process designing the surrounds of a suburban homestead in Victoria.
Take it away, Dan…
The VEG Design Process
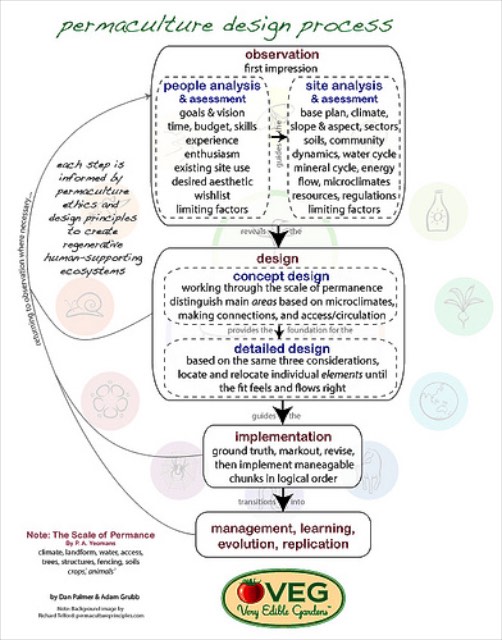
The below diagram summarises VEG’s approach to permaculture design, and unless you are particularly interested in such matters, just notice the four main phases – observation (of people and place), design (concept then detailed), implementation, and management.
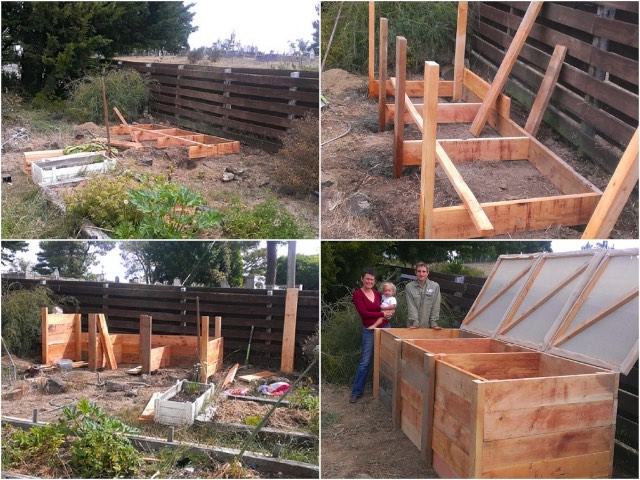
Here we’ll show how we went through the first two phases with a little bit of the third and forth thrown in too (it just so happened that VEG’s Will and Josh constructed a VEG compost bay system as the design unfolded, and that they are now in use).
1a. People Analysis & Assessment
So step one after a quick first impression (and in this case downloading an aerial photo on the train on the way there) was to share a cup of tea with our lovely customers Elvira and Jan.
Again I won’t bore you with the details, but the most important thing this resulted in was first a stated purpose for the design in terms of the flavour of the space the design was intended to help realise, and second a wishlist of desired items.
With the stated purpose I started by asking for some words Elvira and Jan would like to be true of their garden.
They said “colourful, green, relaxing, light, kid-friendly & welcoming, eat from garden most days, private, free of ivy, full of life, multiple spaces“
As it was only a prelim consult and we had to push on I quickly worked these into the sentence:
“Our garden is a colourful, green, relaxing and private space that is full of life, fruit, and veggies. With multiple spaces to explore, it is welcoming, safe and friendly to kids, and free of ivy.”
I read this out to Elvira & Jan and asked them if it felt good and right and true to what they both wanted (it did – based as it was on their own words – in fact they got quite excited to hear their future garden described!).
This sentence gave the whole consult a solid grounding – once you have a statement like this, you can assess all of the subsequent details to make sure they fit in with and contribute to it.
The other important bit was the wishlist, which Dan grouped into the following areas:
- berry patch
- veggie patch (salad greens & kitchen herbs as well as main crop beds)
- fruit trees (were keen on both deciduous and evergreen)
- natives
- utility area (greenhouse, propagation, outdoor sink, compost bays)
- possible future tank
- lawn
- entertaining areas
1b. Site Analysis & Assessment
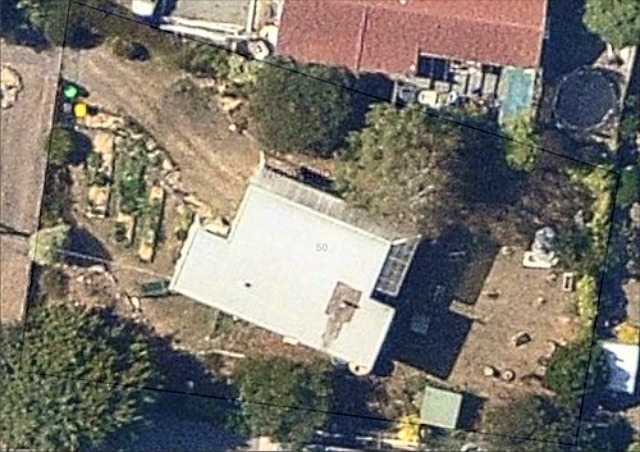
Here is the basemap of the site, with the legal property boundaries overlaid on an aerial photo (accessed from nearmap.com which we subscribe to – is generally more recent and higher resolution than google):
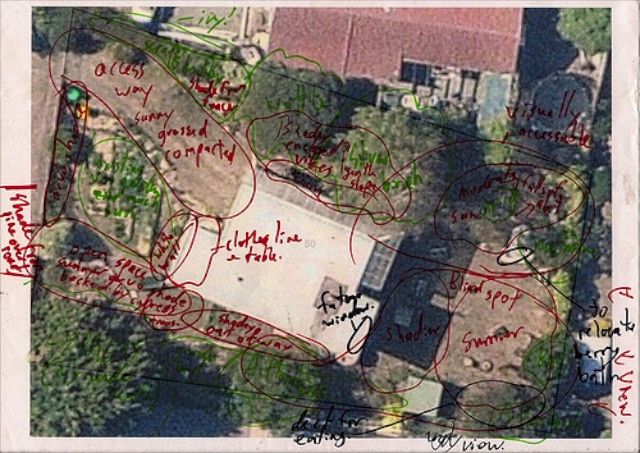
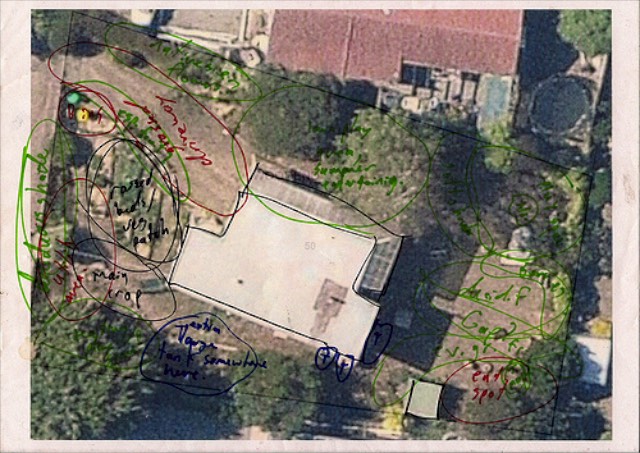
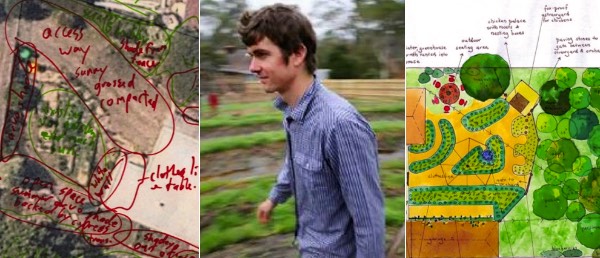
Next here is a rough sketched summary of the site analysis focusing on relevant forms on incoming energy (wind, views, sun) and the microclimates or differences across the site, diagrammed as overlapping bubbles, blobs or clouds with rudimentary labels:
2a. Concept Design
Having done the people and site analysis & assessment minimum justice, we moved into the design phase where we start by locating, shaping and sizing the required areas (as opposed to the individual bits and pieces).
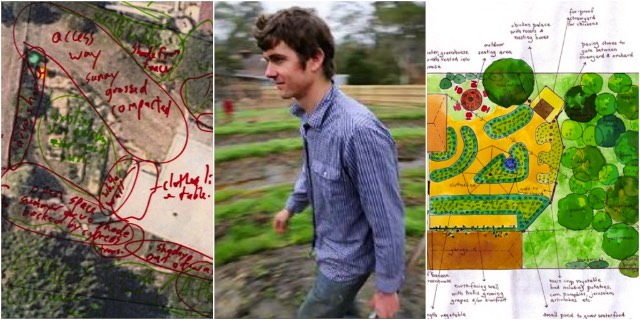
The concept design looks much like the microclimate analysis – with overlapping blobs. To paraphrase Christopher Alexander, here we are massaging crinkles into the site, though what we are largely doing is relabelling crinkles that the site actually massaged into us! (during the site analysis).
Here is my concept design for this site:
2b. Detailed Design
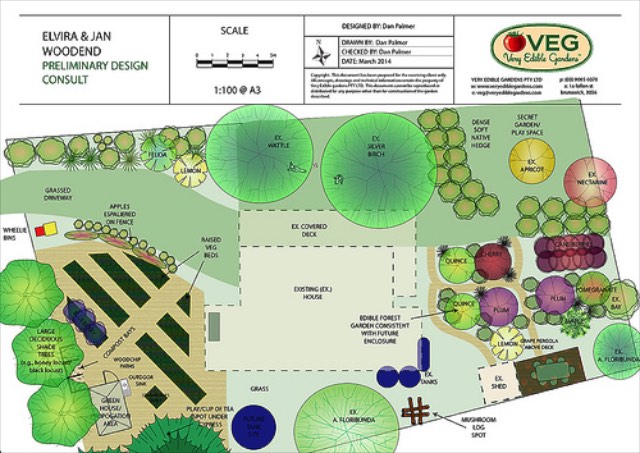
Once the customers have been talked and perhaps walked through the concept design, and their feedback incorporated, we then detail the design, moving from the placement of overlapping areas to the placement of distinct things, taking into account the site and its microclimates, access and circulation patterns, and making as many positive connections as possible.
Here is the detailed design Dan next knocked up (whilst still on site – design rendering is much easier when you’re still there!):
Note that while the detailed design might look more impressive, the germ of the design, the underlying pattern, is in the concept design.
The rest is details, variations on an underlying theme.
I also like to record a short video clip talking through the design before I leave, often a great idea and much easier for many people to get a flavour for the thinking behind the design and what the garden will look like post implementation:
https://youtu.be/lK_RBRQVbls
3. Implementation
So the compost bays were implemented in conjunction with the design, and here are some photos of that process:
Elvira and Jan also had a working bee to make some major progress on the rest of the design with 20 or so helpers on site.
4. Management
It was great to hear soon after from Elvira that the first compost bay has been filled and is steaming away and the microbes do their thing.
Anyways that’s one example of the VEG design process which in this case unfolded over about 4 hours on site and 1 hour off site, and which included a report (32 pages though much of it generic) talking through the details of the design with plant suggestions and whatnot. – Dan Palmer.
We are stoked to have Dan Palmer up in Sydney this October for an Advanced Permaculture Design course – 2 days of process, examples + whole systems thinking, to enable you to be a better permaculture designer. We can’t wait.
This article was originally published at veryediblegardens.com.au – thanks guys.

