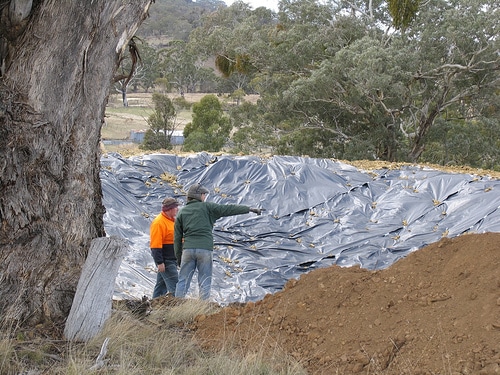
Nick and Mark discussing the merits of DIY dam sealing techniques
A leaky dam is an embarrassment to everyone concerned. The earthworks operator who built it feels terrible. The people who paid for it feel indignant. The folks who designed it feel responsible. And the ground beneath the dam wall feels wet.
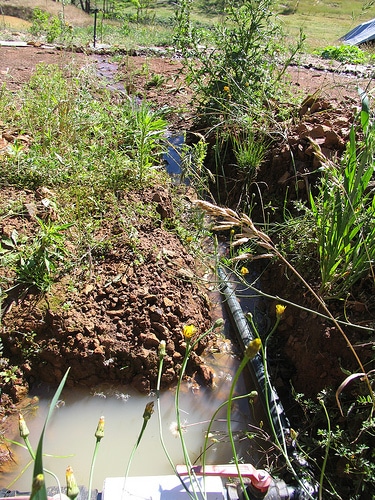
The leak where it exited the dam wall. Note rivulet heading off downhill. Not good.
The leak in our dam wall was also next to the pipe. This pipe sat in the bottom of the dam and delivered water to a tap on the outside of the dam wall, from which we could water plantings via passive water pressure.
Carefully constructed, with baffle-plates to stop water passing along the pipe as it went through the dam wall, with removable filters at either end, this was our pipe of dreams. It would be our food forest’s lifeline in dry summers, and eventually supply our bathouse with water.
Following some decent rain, the leak in the top dam got worse and produced a rivulet which ran through the food forest planted directly below the dam. This food forest was sited specifically to benefit from the slow plume of water which would emanate from the dam uphill via osmosis.
Our carefully selected, hardy, drylands food trees that were in the direct path of this rivulet promptly turned up their toes and died from wet feet.
Following a bunch of research and talking to Permaculture earthworks experts, we were still at a loss. It turned out that all the dams along the valley leaked, regardless of their having a keyway or not, or a pipe or no pipe through their dam wall. We tried attempting to seal the dam with lucerne and bentonite (which was easy to apply as the leak had helpfully emptied the dam entirely), to no effect.
We considered various techniques, and in retrospect perhaps should have borrowed some pigs and attempted to seal the dam via a method called glaying – a technique which uses a large number of animals, penned into a dry dam for a short period of time, to seal the dam by smushing their manure into the surface of the inner dam wall so effectively that it seals the deal. Apparently works great with pigs, even on pure shale, according to Joel Salatin.
So unless we wanted to seal the top dam with a very expensive, condom-like, custom-made, non-food grade, emanating who-knows-what plastic lining (we didn’t), or just hope the leak would reduce in time (and have no irrigation water in the meantime without constant pumping – no thanks), our options were few.
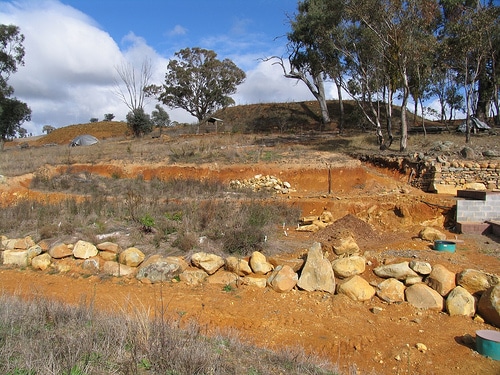
New dam is lump to the left, old dam (new suntrap) is lump to the right. House building site is infront to the right.
The one other thing was that the top dam was not quite in the best spot. It was a little close to the building envelope that was slowly developing downhill, and I was having visions of my family tumbled out of their beds by a wall of water when a once-in-a-lifetime earthquake shook the top dam wall to bits.
So we made a deal with our earthworks operator (who, as I mentioned above, luckily felt terrible about the leak) and decided to move the top dam south a bit.
Believe it or not, this all worked out quite well. We turned the ‘old dam’ into a north-facing amphitheater / suntrap which will be great fun as an experimental microclimate.
I have hopes for bananas in about 5 years, once the protective ring of bamboo gets up. The ‘new dam’ we took no chances with, however, and lined it with plastic the minute it was finished. Yes, builder’s plastic. I know. Most un-permaculture. But let me tell you something: it worked a treat. And now we’ve got water.
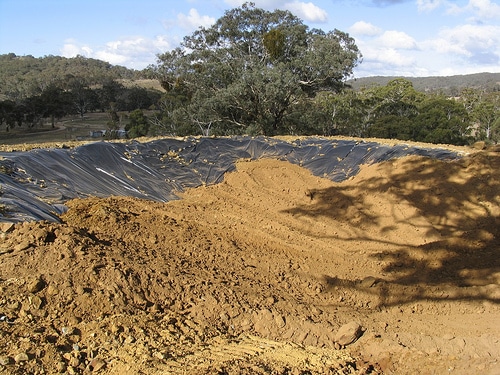
Topsoil being slowly and carefully loaded ontop of the builders plastic, from the bottom up.
And so a note on lining dams on the cheap, for the poor wretches among us that suffer from similar disasters:
- First of all we put down a thick layer of lucerne hay, all over the inside wall of the dam. We basically stood large, cylindrical rolls of the stuff on the dam wall and unrolled them down the slope to the bottom of the dam. This was then wetted down with a pump and hose. This will rot down under the plastic in time, and also helped to protect the plastic from punctures from below as we laid topsoil ontop of it. If you can’t get lucerne you could use other hay, but lucerne is great because of its high nitrogen content which will help it turn into a more sludgey impermeable layer as it rots down under the plastic.
- Next we unrolled long rolls of black builders plastic down the slope of the inner wall, covering the lucerne hay. We made sure the strips overlapped by a good 40cm on each side, and weighed the whole palava down with rocks. Carefully, so we didnt puncture the plastic.
- Then we got the dozer driver to place loads of topsoil on top of the builders plastic, to a depth of about 30cm, starting at the bottom of the dam wall and working his way up so it didn’t slump off. This way he also didnt have to risk puncturing the plastic by driving a great heavy bulldozer over it. The depth of topsoil on the builders plastic means we aren’t so concerned about our catchment coming from a giant plastic cup.
- Then, when it was all covered, sealed and looked just like a new dam, we said a little prayer and crossed our fingers.
At time of writing, 6 months later, the top dam is full to the brim of water and the most water-tight dam on Milkwood. We ended up using a simple syphon, held a meter below the surface, to provide water to the food forest and other plantings below. We’ve still got great passive water pressure (about 6m of head) and no babbling brook at the base of the wall. The new dam is on the same contour as the old dam, and so is still fed by the 2km of top swale to the north and south.
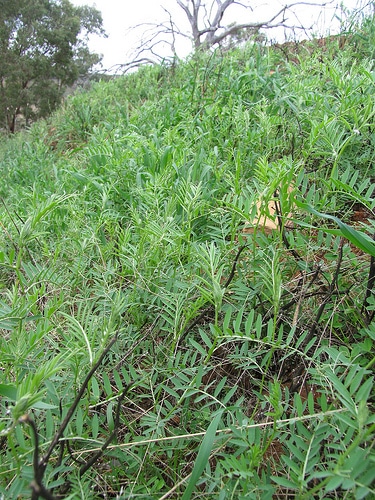
Vetch doing its thing on the dam wall, fixing nitrogen and holding the situation together.
We’ve mulched and planted the dam wall with oats, vetch and clover, and we look forward to a long, loving and hard-won relationship with our passively harvested water supply.


