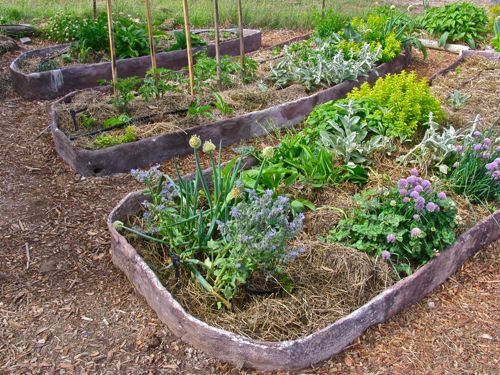
Ferrocement (sometimes called thin-shell cement) is a construction technique where cement is thinly applied to a sturdy steel or wire frame. It is very cheap and relatively quick to do, and produces extremely strong structures.
While it does involve cement, which has quite a large energy footprint, the resulting strength-for-inputs equation means it is a suitable and ethical option for some structures, particularly those requiring great strength.
We’ve been wanting to have a play with ferrocement for years, but weren’t quite sure how to go about it, or what to build. Recently our friend Tom arrived at Milkwood armed with the right knowledge however, and suggested we update the kitchen garden at basecamp by incorporating some new no-dig beds with ferrocement edges.
As always, when trying out a new technique, it’s best to start small. So we held off on making a ferrocement boat, watertank, house or grain silo, all of which ferrocement is (apparently) commonly used for around the globe. We thought we’d just start with a garden bed or two, and take it from there.
The possibilities of ferrocement are endless – if you can make a frame to the shape, cover it in chickenwire and pat a thin veneer of cement onto it, you can make it out of ferrocement.
For our basecamp kitchen garden, we decided to keep the existing contour beds (which needed a bit of love after winter anyway), take them apart and enclose them with ferrocement edges about 30cm high. This means the edges of the beds will be better defined, the ferrocement edge gives us something to lean on when we pick from the beds, and the beds will be able to retain a certain amount of water at the bottom of the root zone in dry periods, rather than that water wicking into the drier paths.
The ferrocement edges also mean we can build up the deep mulch in these no-dig beds higher than if they were just heaped up from path level, which will help with evaporation here in our high and dry summer climate.
So. Here’s what we used to make our ferrocement garden beds: we were able to make these out of mostly recycled materials and they turned out beautifully.
Materials
- Various lengths of recycled “rebar” – the reinforcing bar usually put in a concrete slab – any scrapyard would have some.
- Scraps of recycled chicken wire
- “Rebar ties” to wire the chicken wire to the Reo Bar (because we already had them) – but you could just use bits of wire
- Sand mixed 3:1 with cement (three parts sand to one part cement)
- Wheelbarrow for mixing cement and something to mix it with
- Water
- Gloves
First of all, we clearly defined the beds, dug out the paths and created a small channel around the outside of the beds where the ferrocement would go.
The next step was to define how much rebar we needed. We laid it out around the beds.
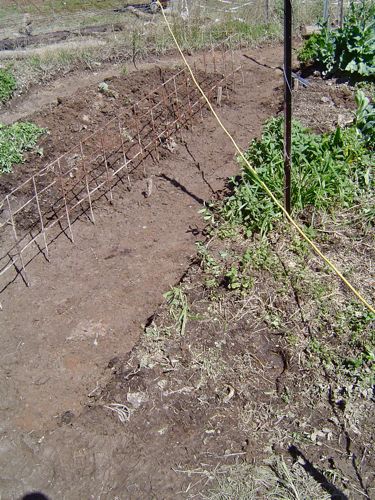
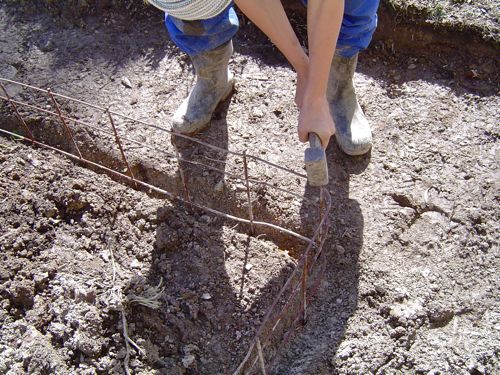
Then we cut the rebar to size, and took the crossbars off the bottom squares. This meant the vertical bars of the bottom squares could act as spikes to hammer into the ground, keeping the rebar edge vertical.
Next we bent the rebar to the shape of the bed, and hammered it into the ground.
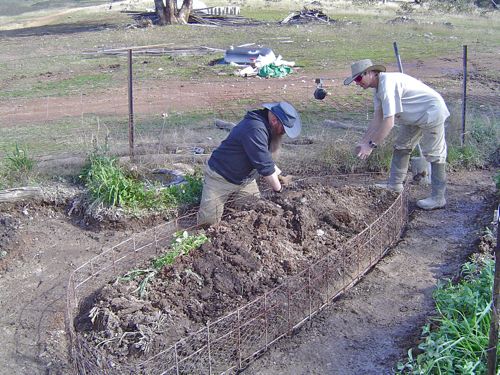
Next we covered the rebar in our scraps of chickenwire and attached them with the rebar ties.
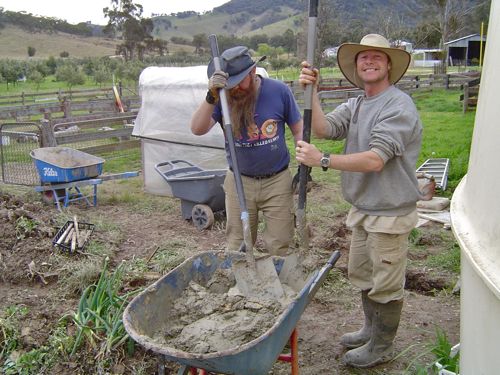
Time to mix the cement. Apparently the recipe is 3 parts sand to 1 part cement, and then add water slowly, stirring all the while, until you have something the consistency of ice-cream, or until a line drawn with a finger lightly through the mix only just falls back in on itself.
The application of the cement to the wire took a while. Lots of pat-pat-patting. You get the hang of it after a while. We did a first rough pass followed by a smoothing second pass.
Once the cement was semi-dry, we brushed on some oxide (cement coloring) mixed in water. The cement drinks in the oxide and this way you get an aesthetic finish which doesn’t involve any paints.
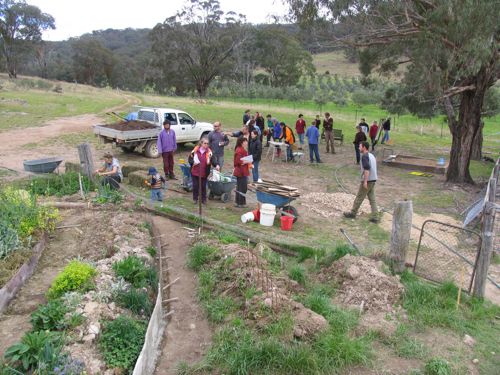
Ferrocement garden beds in progress, with permablitzing PDC students to right. Note all the tomato stakes sticking out of the newly made ferrocement walls
One thing to note is that we wanted to ensure that water could exit near the bottom of the ferrocement walls, to prevent waterlogging of the beds in a heavy downpour. To do this we stuck a bunch of tomato stakes through the rebar before applying the cement, and pulled them out once the cement was all in place. This created a series of holes low down in the down-slope wall of each bed.
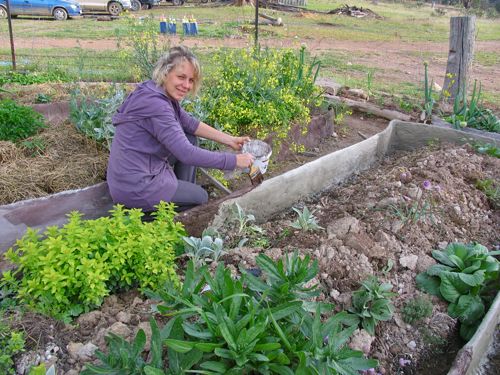
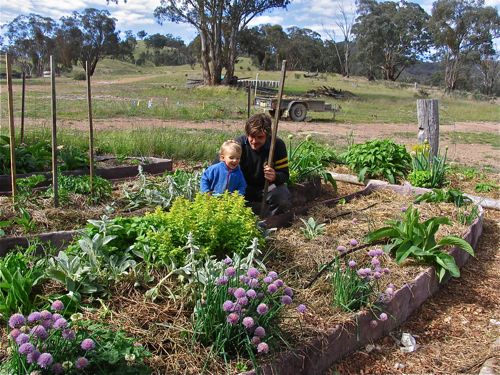
And once they were done, we mulched heavily and now we’ve been busy planting our spring seedlings, packing our new-fangled beds through of good things to grow and eat over summer.
In retrospect, this technique has both pros and cons. The good things about it include the cheapness and accessibility of materials (which is probably why it’s used in hard-to-get-to locations around the globe), and the not so good things include that its relatively labour intensive. So, like any construction technique, it’s perfect for some scenarios, and not so much for others.
Would we use it again? Well, we’ve been trying very hard to figure out how to do a large wicking bed system for our Milkwood kitchen garden. We definitely want to use wicking beds, but we definitely want to avoid plastic, so we need some other sort of water-holding reservoir for the bottom part of the wicking beds, which is also very strong. Ferrocement might just be the answer – we’ll keep you posted as we finalise that design…
Ferrocement resources:
- Ferrocement.com – multilingual resource centre
- Ferrocement house instructions
- And lastly, ferrocement boats!
Big thanks to Tom Bell for his energy, enthusiasim and knowledge. Big thanks also to our fabulous interns Andrew, Adam, David and Alexe who got into it and made it happen (especially Andrew for his photos). Our future vegetables and herbs, and all who will eat them, tip our hats in your general direction!






I saw some ferro cement wicking beds in Hay. I’ll take a picture and send it to you.
That would be awesome, Sam. Much appreciated – were they working well?
Make a ferrocement reservoir no higher than 12 inches, 10″ might be better, can’t have it too high or it won’t wick up enough. This will be placed in the ground, the top of the reservoir will be at ground level, below your raised bed garden. Lay a black perforated 4 inch plastic pipe length ways( or make a concrete pipe if you don’t want to use the plastic )along the bottom of the reservoir and up to the top of the finished raised garden bed. This is how you fill the reservoir with water after all of the compost… Read more »
Thanks, Joe, yes we’ve made wicking beds before, using gravel for the reservoir… https://www.milkwood.net/2010/05/11/how_to_make_a_wicking_bed/ – what i’m curious about with a ferrocement wicking bed is whether you’d have to have an impermeable layer on the floor of the reservoir, or whether you could get away with packed earth…
I am loving this discussion of wicking beds using non-plastic materials and especially the concept of ferrocement projects. One thing for sure, if you use ferrocement structures you had better make sure you want them for keeps! They are amazingly strong and you won’t want to take them down! I used 1/4 inch hardware cloth wire mesh for some of my beds. I folded the cloth over to double it which achieved two things: the top edge was not sharp, and the mortar didn’t pass through to fall out the other side as easily. Makes the process a whole lot… Read more »
Thanks heaps for the great idea! Can’t wait to get started on a ferrocement herb spiral!
And it turned out GREAT:
http://www.youtube.com/watch?v=v8y6jLsEyy0
Thanks again for the recipe guys 🙂
Thanks for the article, great! I have been looking for info on this. Want to make a grey water treatment system from ferro-cement tanks.
There seems to be an issue with the links in the ‘resource’ section… I can activate the first 4 only if I hold the mouse over the ‘F’ of the line/link. The last one I can’t seem to activate at all.
You are doing such great work sharing the things you do! Thank you.
Traducido al español
http://permaculturadominicana.blogspot.com/2016/03/como-hacer-camas-de-ferrocemento-para.html
Wow! That looks great, im going to try this.
I’m not sure what state you are in , would this method stand up to an area that experiences heavy winter snow ,, thaws heaving etc.
Im in Canada [freezing , heaving etc.]
Robert the short answer is I don’t know, re freezing? These were done in a temperate environment in Australia 🙂
I’m in Nanaimo bc, it got to -10 here last year and my Ferrocement beds look perfect
good to know Sasha, thx –
Nice addition to the home gardener but what you are using is either hog or cattle panels, not rebar. Rebar is the round rough iron rod which is often used as reinforcement in concrete projects.
maybe its called different things in different countries? This stuff that we used was indeed the rough iron rod mesh used to reinforce concrete, cut down to size w an angle grinder 🙂