

Last winter, Nick decided that the best way to grow oyster mushrooms for us would be in a bucket. Plastic bags of mushrooms are great and fine, but they’re one-use only, and result in wastage with every harvest.
Food-grade buckets, on the other hand… Nick figured we could use these to grow our shrooms in, and then re-use them for years. Decades, even. And so he tried it, and it worked.

Proud Nick with his new mushroom-growing system last winter…

Into the kitchen and ready to harvest (to fry with garlic + butter, of course)
At the time when we first blogged about our success with this technique I got a small avalanche of emails saying ‘you should patent that idea, and if you don’t want to, can I?’
To which we said: no, and, er, no.
Because growing mushrooms is awesome, and part of our resilient communities’ food futures. And putting patents on such things as growing techniques does not help get people growing. We also weren’t the first ones to do it, it’s an idea that’s been around for years.
And after all, it’s just a bucket. With holes. You can make one too. You should, actually.
The big thing for us with this bucket’o’shrooms™ (just kidding) idea was that we wanted the whole system to be re-usable.
This meant that we had to find a way of keeping the bucket of substrate temperature and moisture stable, until the mycelium colonised it completely enough to start fruiting out the holes that we’d pre-drilled.
Putting the bucket in a plastic bag (or a plastic bag in the bucket) would technically do this, but the chances of you re-using that plastic bag for a decade are unlikely.
The solution? Another bucket.
If your bucket is slightly tapered at the base (as most buckets are), you can slip another bucket of the same size over your fruiting bucket.
This should fit snugly and do a great job of holding in the moisture until your fruiting bucket’s mycelium is ready to face the world. No plastic bag required.
We’re making heaps of these this year, and looking forward to the harvest. I’ll report back when they’re fruiting so you can see how this year’s crop goes.

Theirs look bigger than ours. I’m sure it’s just the filter…
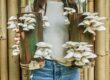
Lastly, it’s great to see this growing technique is catching on. These guys have chosen to go with ‘bag in a bucket’ that you then puncture to fruit approach, making the bucket kinda like a very sturdy bag-holder.
The bucket is still a great idea in this context though – it’s sturdy, can be stored/stacked away until it’s likely to produce your mushies, and if you had 6 of them you could make a stackable, delicious mushroom tower…
I take this as a good indication that we’re onto a technique that’s viable, given that someone else decided to make a business out of it…
Either way, it’s a great idea. And you can learn to do it yourself from scratch, at home, with simple, inexpensive tools and materials. Hooray for fresh breakfast mushrooms!
If you’d like to learn comprehensive mushroom cultivation, we run awesome Mushroom Cultivation Courses in Sydney and beyond. Or check our how-tos below…
>> More posts about Mushroom Cultivation at Milkwood.net

Home grown breakfast mushrooms are go.