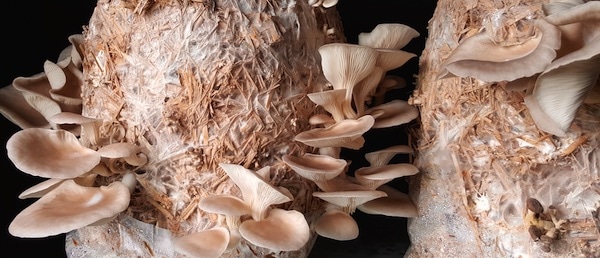
So you’ve got your bag/jar of spawn, and you’re ready to turn it into many bags (or buckets) of mushrooms. Here’s a simple + effective way to go about that process.
Firstly, take your bag or jar of spawn that you’ve either cultivated yourself, or bought from a mushroom supplier.
Break up the spawn (easier to do without touching the spawn if done in a bag, which is one reason why spawn is generally grown in bags).
Then it’s time to prepare the bulk substrate. This is the material that the mycelium (ie your spawn) will eat.
Different types of mycelium like to eat different types of things. Here we’re using oyster mushroom mycelium, which grows well on straw and other high-carbon, grassy materials.
Here we’re using organic sugarcane bagasse – because it’s a waste product, and easy to replicate for our students at home.
Pasteurising the substrate
First step is to pasteurise your substrate, to give your mycelium a head start over the rest of the organisms in the bagasse.
In this case we are using pasteurisation over sterilisation, which removes all life. Pasteurisation involves killing some, but not all of the organisms present, and it’s easier than sterilisation.
Why pasteurise?
- Pasteurisation is used for fruiting substrates, because the spawn is already growing vigorously and can out-compete most organisms
- Pasteurisation is usually cheaper than sterilisation – it requires less equipment and energy.
- Pasteurisation leaves some thermo-tolerant organisms behind, which can offer protection from competitors to the mycelium
There’s a bunch of ways you can go about this process, but here’s how we’ve whittled ours down over the years to the most time, energy + cost efficient way for home-scale mushroom growing that we’ve figured so far.
You will need:
- About 3 litres (3 quarts) of grain spawn of your choice of mushroom variety
- 30 litres (8 US gal) of substrate – anything high in cellulose and low in sugars and nitrogen should work, we used organic sugar cane bagasse
- 250 ml (1/2 cup) hydrated lime (also called builders lime)
- 250 ml (1/2 cup) rice bran (you could also use wheat or oat bran, this is just to give our fungi a little extra nutrient, if you get mould omit the rice bran next time)
- eye and hand protection and a face mask
- a tub to mix and hydrate the substrate in
- a clean brick (or similar inert + heavy thing)
- A 50 litre (14 US gal) bucket (or plastic garbage bin) with lid
- 3 pillowcases (funky 70s patterned ones like ours optional)
- rope
- 40 litres (10 US gal) of 80ºC (175ºF) water – a large urn is good for this job
- A clean table or tarp
- Clean mushroom bags or buckets to put your inoculated substrate in.
First, put on some gloves, a mask and eye protection before you start. Hydrated lime is highly caustic and can burn your throat and cause serious damage to your eyes. It does not produce any toxic byproducts, but it does burn.
Alrighty, let’s go. Put your substrate in the tub and add the hydrated lime. The lime is great for shifting the pH of the substrate suddenly (which kills a bunch of competition).
Add the rice bran then add enough warm water to ensure all the mixture is damp. Then mix it all up and around.
You want to make sure the mixture is nice and damp and well mixed so the heat in the next step can get right into the middle of the bags, dry substrate is a very good insulator.
Fill your pillowcases with the wetted mixture, and tie them up well with rope – leave a fair play of rope attached, as you will hang these up while hot to drain.
Put your pillowcases in your clean 50L bucket and, carefully, pour your 80ºC (175ºF) water over them until the bucket is full. Add a brick on top of the bags to submerge them, and put the lid on. Then go wash your hands.
Wait 2 hours. To pasteurise the substrate, it needs to remain above 60ºc (140ºF) for two hours.
In our climate, this method is enough to do the job – if you’re somewhere colder, consider insulating your bucket somehow for this period, or use a metal barrel on some bricks instead and make a small fire underneath to maintain temperature.
After two hours has passed, test water temp with a thermometer (ours came out at 65ºc).
Before you go on to the next step you want to increase the cleanliness level a little. We don’t want our nice contaminant free substrate to come in contact with any nasties.
Make sure you clean your hands with alcohol gel hand sanitizer or a 70% alcohol solution (30% water ) to kill off any potential contaminants. If you don’t want to get alcohol gel on your hands wear rubber or latex gloves and clean them with the alcohol.
Wipe down any surface that the substrate will be in contact with using alcohol solution.
If all is well, take out your soggy substrate filled pillowcases and hang ’em up to drain for at least 15 minutes. We want all the water to drain out of the substrate, you might need to give them a squeeze to remove any excess water.
Now you’re ready for the next step!
Inoculating the Substrate
Once the pasteurised substrate has stopped dripping and you can’t squeeze any water out of it and dump it out onto a clean surface to cool.
Once it is down to below 35ºC (95ºF) it’s time to add your grain spawn.
Take your bag of broken-up spawn and sprinkle it along the length of the substrate.
Then, with clean hands, mix! You want that spawn distributed throughout the substrate as evenly as possible.
Once everything is all mixed, it’s time to bag up. Take handfuls of inoculated substrate and pack them into your mushroom bags, jars or buckets, whichever you are using.
Seal things up so that nothing else can get in there, and put your future mushrooms in a warm dark place – a stable temperature of about 24ºC (75ºF) is best for most species.
After a few weeks (or months, depending on your spawn-to-substrate ratio and mushroom variety) – your creations should be ready to fruit! When the substrate in the bag or bucket is white and fully colonised with mycelium, you know it’s about ready.
When you think it is ready open your fruiting bag / bucket / basket and put it in a place with the some airflow, cool temperature and high humidity. We’ve used our bathroom in the past.
You can often trigger a stronger fruiting by soaking your mycelium in cool clean water overnight.
Happy eating!
Resources:
- All our mushroom cultivation articles
- Growing Gourmet & Medicinal Mushrooms by Paul Stamets (the text book on this subject)
- Organic Mushroom Farming and Mycoremediation by Tradd Cotter
- Mushroom bags / grain spawn: check our recommended suppliers here.
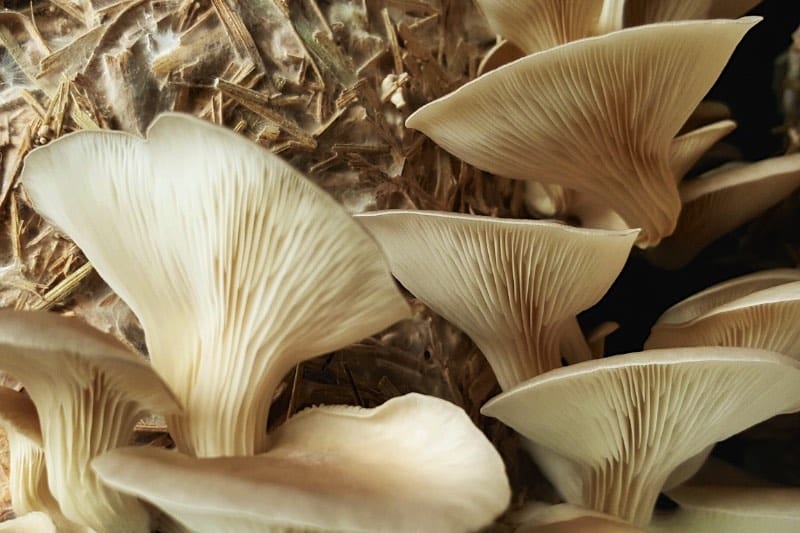
We run Gourmet Mushroom Cultivation Courses, as you can probably tell from the above photos! They’re excellent and have spawned many happy home + enterprise-level mushroom growers. Join us sometime.
Big thanks to Nat McComas for the beautiful photos above. Love your work, lady!





Thank you very much
Thank you for this info