
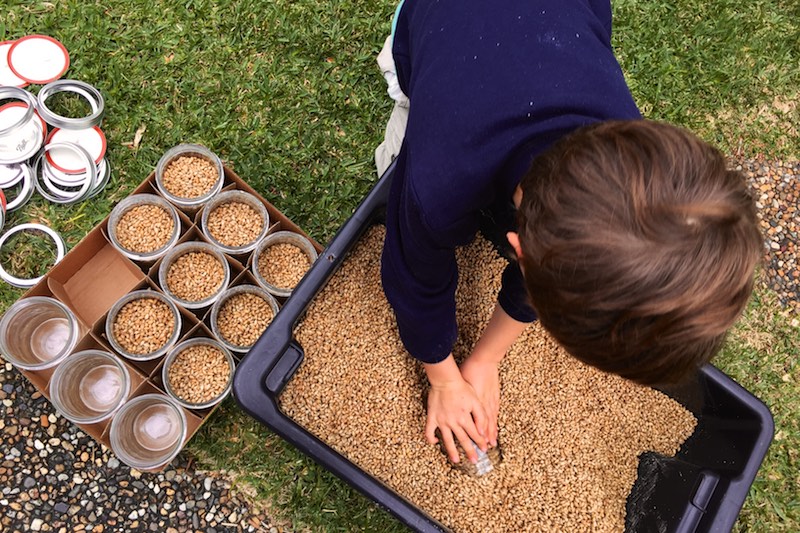
Making grain spawn is a stage of mushroom cultivation the whole family can get into – there’s a job for everyone.
This stage of the mushroom cultivation process comes before you use your grain spawn to inoculate your final bulk substrate, but after you’ve made (or purchased) your pure culture.
The process of making grain spawn is almost identical for growing all kinds of different mushrooms from Pearl, King, Pink, Blue, Golden or White Oyster Mushrooms to Shiitake, Enoki, Reishi, Pioppino or Lion’s Mane.
Here’s Paul Stamets’ excellent diagram that shows the stages of mushroom cultivation with the preparation and inoculation of grain spawn highlighted.
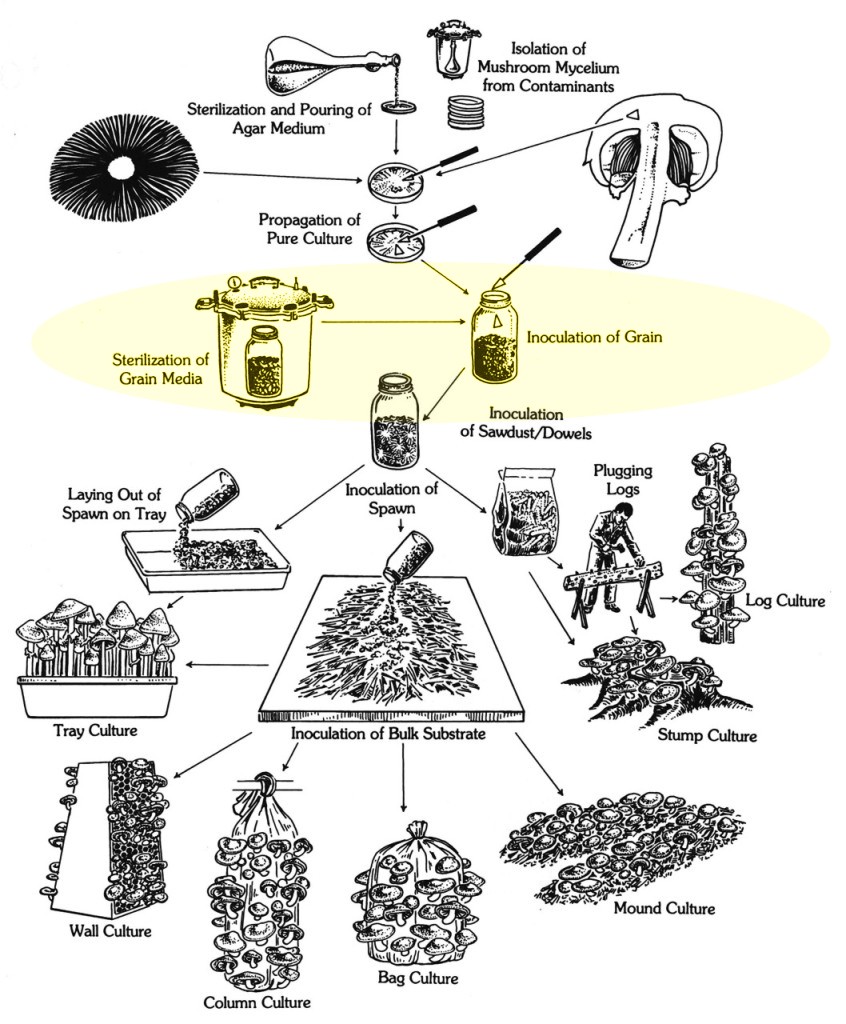
Diagram from “Growing Gourmet and Medicinal Mushrooms” by Paul Stamets – click to enlarge
Last blogpost we shared Mushroom Cultivation: Pasteurising Bulk Substrate for Many Bags of Shrooms – the stage where you take your grain spawn and add it to a fruiting substrate.
This is the stage before that one – the process of making the spawn to innoculate that substrate – straw, woodchips or whatever you choose.
The purpose of grain spawn is to allow your chosen mycelium to multiply in a controlled environment, before you let it loose on your fruiting (bulk) substrate.
To achieve this, your grain (in this case, organic wheat) needs to be sterile. The easiest way to do this for a home cultivator is to use a good quality pressure cooker.
We spent this afternoon making grain spawn, to grow lots of lovely mushrooms.
We’re trying to produce no waste during our mushroom cultivation.
We’ve been using jars, rather than one-use plastic bags or containers, so when we found out about a neat little trick to a devise an air filter for our jars, we had to try it.
This air filter allows some gas exchange while preventing biological contaminants from entering the jars. This lets our mycelium breathe while stopping any other fungal spores like mould getting in.


Making air filters for your Grain Jars
- 12 x 500ml (1/2 quart or thereabouts) bottling jars with metal lids
- a small phillips head screwdriver or a big nail, a hammer and a wooden block
- a small handful of polyfill (the polypropylene stuffing used in cushions)
Instead of polyfill, you could use something else inert + porous that doesn’t absorb water, and which will withstand the pasteurisation process, as you don’t want to be adding this element afterwards (due to obvious contamination issues).


Sterilizing substrate for Grain Spawn: You will need
- 12 cups (3 litres) of organic whole wheat grain (pre-soaked for 24 hours in cold water)
- 12 teaspoons of gypsum (calcium sulfate – you can buy it in any garden centre – sometimes sold as “clay breaker”)
- Your 12 jars, as prepped above with air filters, or plastic containers, if you want to go that road (see below for design)
- a pressure cooker
After soaking the grain for 24 hours, we drained it in a big colander until no more water dripped out, then we mixed in the gypsum.
Then we ‘jarred up’ the grain into the clean jars, filling them to 3/4 full.
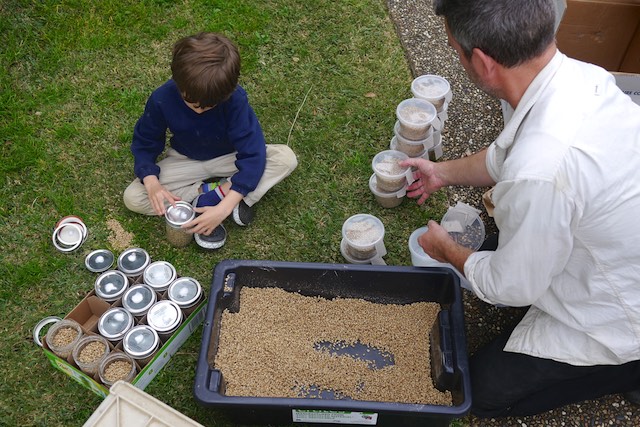
Once our jars were full and the lids were on, we put them all into the pressure cooker with two inches of water in the bottom.


A note on pressure cookers – these things are marvellous devices, but they are also, basically, steam-and-metal bombs in waiting if not handled properly. Always, always read the instructions on your pressure cooker in full before using it.
Since we had read our pressure cooker’s instructions in full already, we closed it up, turned the heat on and held the pressure cooker at 15psi for 2 hours.
Allow the pressure cooker to cool fully before you take off it’s lid, and remove your jars of pasteurised spawn.


Those plastic containers…
We also made up some plastic containers of spawn, to give away to students later – one of our students came up with the excellent hack of attaching a strip of paper under the lid of each container – this prevents the containers distorting in the heat of the pressure cooker as it allows a small amount of gas exchange to occur, while keeping the container’s contents sterile.
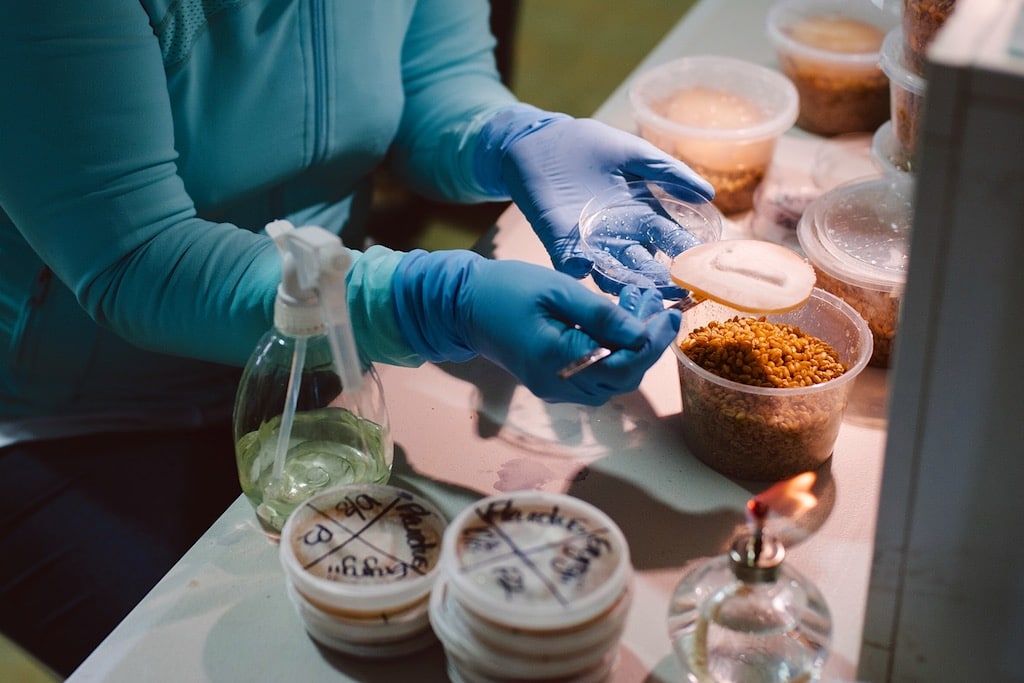
Once you’re sterilized your spawn
Now comes the fun part! Once the grain in the jars is completely cooled down, it’s back to your sterile-as-possible lab, to add a slice of your pure culture plate to the nicely clean spawn.
In theory, if all goes well, the mycelium on that piece of pure culture will then colonise your clean grain, eating it up.
And in a week or two (7 days if you can hold your spawn at 24 degrees celcius) you should have fully colonised spawn.
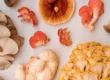
For this session, we used piopino, reishi, pearl, king + blue oyster, shiitake and lions mane cultures.
Fingers crossed they all grow happily.
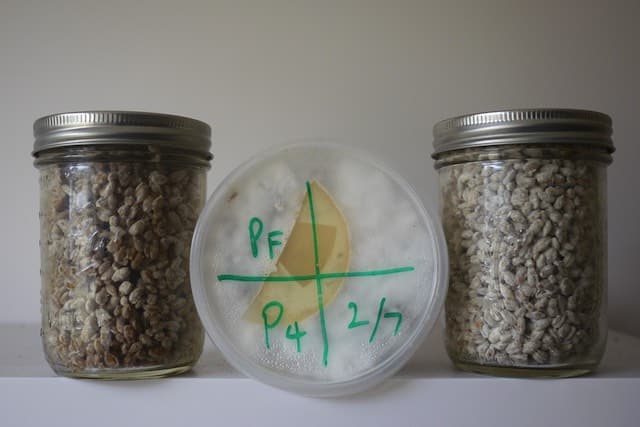
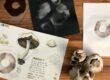
Colonised spawn – you can see the original pure culture agar strip in the plastic container in the middle, surrounded by fluffy, healthy mycelium
How to tell if your spawn is colonised
Your grain spawn at this stage should be white and fluffy in the jar – this is a sign of healthy, colonised spawn.
Generally speaking, white and fluffy is good, and blue, pink or yellow is bad. Colours other than white indicate that other fungus spores or bacteria have jumped in and colonised your spawn. Throw it on the compost pile and start again, if this happens – live and learn!
Once you have your fully colonised grain spawn, it’s time to pasteurise some fruiting substrate (woodchips, sugarcane mulch, sawdust – the exact substrate depends on what your fungi species prefers to eat) and add the spawn to that.
Here’s a post about making a mushroom garden with spawn – you can see they’ve used big bags of spawn for this purpose.
And then you’re into the final stage of mushroom propagation, before eating! How excellent.
Gear we used for this stage:
- Demeter Organic Wheat Grain that we get from Honest2Goodness
- All-American Pressure Canner – AussiMushrooms or Amazon
- Ball Mason preserving jars
- Pure culture – if you’re not up for making it or sourcing from a friend, try Milton Mushrooms or AussiMushrooms for supply
We run Gourmet Mushroom Cultivation courses in Sydney if you’d like to learn to grow with us!
Mushroom Cultivation Resources
- Mushroom Cultivation: Good books for Aussies
- All our posts about Mushroom Cultivation
- Growing Gourmet and Medicinal Mushrooms – the Paul Stamets book the above diagram is from
Good luck, cultivators! May your dinnertime cutting boards soon be full of a flush of tasty oyster mushrooms like this…
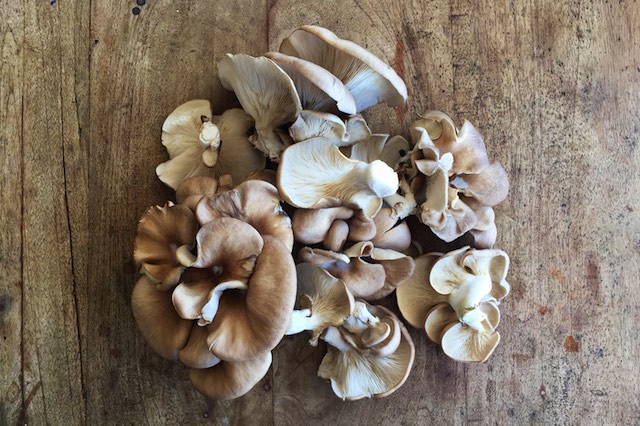
Pic #18 by Nat McComas, taken at a recent Gourmet Mushroom Cultivation course – thanks, Nat!


Love this instead of using bags! Just wondering why you went with the canning jars instead of just using regular jars and lids? Are you using a new jar lid each time you make new spawn?
Heya Ali, no we re-use the lids, and we used canning jar lids because they’re great for letting pressure out in a pressure canner situation without breaking
Please I need help iam facing much difficult in mantaining the mushroom production IAM agaba augustus from Uganda East Africa
Hey! Thank you for the great article. Just wondering, is the ‘pure culture’ you add to the grain just a slice of the mushroom you want to grow or is it something else?
Hi guys,
I love this article, so informative. I was wondering though
is there an alternative to using a pressure cooker to sterilising
your grain jars?
Hi Marion – there’s not much alternative at a home-level that I know of, though there’s industrial autoclaves etc for larger scale…
I want to know the best way to produce your own inoculate so I don’t have to buy
well, this is one way! Also look yup ‘liquid spawn’ process? We’re filming how-tos on that currently 🙂
In nature mushrooms are not spawning and growing in a closed sterile environment. Why al the sterilization measures? Who is protecting who here?
very true, they’re not. However, if you want *just* the species of fungi that you desire to grow on a nutrient rich organic matter (in this case, the grain) then you need to eliminate all the other spores and lifeforms that will happily out-compete that species. Its a bit like planting just the seeds you want in a tray of compost, rather than chucking them in an established garden and hoping for the best…. they might germinate, and some are more likely to than others, but if you want 20 capsicum seedlings from 30 capsicum seeds in the next two… Read more »
Great visual representation of the process itself.