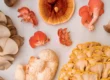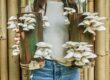


Behold, for we have home-grown pearl oyster mushrooms, and you can too. The process of growing them from scratch is not that tricky once you know how, and results in a luscious harvest of fresh oyster mushrooms.
First of all, you need good spawn. For this session we used a block of grain spawn that he’d grown at home, but you can buy a block of spawn if you’re not quite up to speed on that step. Here’s what to do next:

Will empties a bag of grain spawn into a tub of freshly sterilized straw

Fully colonized grain spawn on straw, ready to mix

Mixing it all in with freshly washed hands

Students start filling the bags


Hooray! Bag ‘o’ mushrooms

Finished mushroom bag, languishing amongst other student resources
So there you have it. Add grain spawn to freshly sterilized straw (which you can make by this method) which is a bit damp, mix it well and bag it up. The last step is to ensure that a little, but not too much air can get into the bag while the mycelium colonises the substrate.
For these bags we used the off-the-shelf bag necks that you can get from mushroom suppliers, but you could cut down plastic bottle necks to do the same job. A piece of foam ensures that spores of other fungi + molds can’t get in, while allowing a very small amount of air in.

Bag neck with foam inserted to prevent contamination while the straw gets its oysters on.

Mycelium starting to ‘run’ and colonise the straw… it doesn’t take long at this time of year

Two weeks after packing the bags, the oyster mushrooms are bursting out the sides! This bag got a hole in it somewhere along the line, and the mushrooms made the most of it.

2 weeks after bagging, with the bags fully colonized by the mycelium, we remove the foam, wait a day or two, and out come the mushrooms out the neck hole… yum yum.
Fruiting mushrooms are a quiet cacophony. That’s the best way I have to describe it… it’s this wonderful event, worthy of trumpets. But it’s silent. And at the end you get to eat them!
There’s no way we could afford these mushrooms from the shops, nor is there any chance that in Mudgee we could source fresh organic ones anyway. But with a bit of know-how and good teachers, we’re working up to skills that we can pass on far and wide, and which will give us a lifetime supply…
If you’d like to learn comprehensive mushroom cultivation, we run awesome Mushroom Cultivation Courses in Sydney and beyond…